STAY INSPIRED

Sign up for 3DSPRO Newsletter and get InSpiration with our content, news and exclusive offers.

3D Plus™ Transparency

3d plus hardware solution_banner

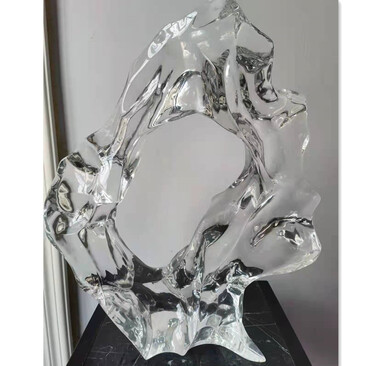
Transparent Resin 3D Prints

Transparency is a post-processing method for resin 3D prints to achieve clear, glossy, glass-like surfaces. Transparency includes careful sanding, polishing, and applying clear coats to remove any imperfections and layer lines, enhancing the part’s optical clarity.

What is transparency?

Transparency in resin 3D prints post-processing refers to achieving a clear, glass-like finish that allows light to pass through the material without significant distortion through sanding, polishing, and applying clear coatings to remove layer lines and imperfections and achieve optical clarity.

Transparent post-processing is essential for applications requiring high visual quality and aesthetic appeal, such as display models, product prototypes, and decorative items.

The Advantages of Transparency

1. Transparent finishes provide a clear, glossy appearance that elevates the visual quality of 3D prints.

2. Transparency allows light to pass through, creating attractive lighting effects and making internal structures visible.

3. Ideal for a variety of uses, including display models, product prototypes, and optical items.

Transparency Process

1. Initial Sanding: Begin with coarse-grit sandpaper (200-400 grits) to remove layer lines and surface imperfections from the resin 3D print. Sand evenly to prepare the surface for finer sanding.

2. Progressive Sanding: Move to medium-grit (600-800 grits) and then to fine-grit (1000-1500 grits) sandpaper, progressively smoothing the surface. Wet sanding is recommended at this stage to reduce dust and achieve a finer finish.

3. Polishing: Use a polishing compound or liquid polish with a soft cloth or a polishing wheel to achieve a glossy, transparent surface. Continue polishing until the desired level of clarity is achieved.

4. Coating: Apply a clear coat or resin to seal the surface and enhance transparency. Ensure an even application to avoid streaks or bubbles that could impact clarity.

5. Curing: If using a UV resin or clear coat, properly cure the part under UV light according to the manufacturer's recommendations, ensuring a hard, durable, and transparent finish.

6. Final Inspection: Check the part for uniformity, transparency and clarity. Inspect under various lighting conditions to ensure no imperfections remain.

Quality Inspection Process

Check out the quality inspection process of transparent resin parts at 3DSPRO.

Visual Inspection
Under various lighting conditions, examine the parts for any imperfections, such as bubbles, streaks, or uneven clarity. Ensure the surface is uniformly transparent and free from defects.

Surface Smoothness
Feel the surface for any rough spots or sanding marks. The finish should be smooth and glossy, without any visible scratches that could affect transparency.

Light Transmission Test
Shine a light through the part to check for evenness in light transmission. The part should allow light to pass through uniformly without significant distortions or dark areas.

Dimensional Accuracy
Use precise tools, like calipers, to measure the dimensions of the transparent parts. Confirm that the post-processing steps have not altered the critical dimensions beyond acceptable tolerances.

Adhesion Test
If a clear coat or resin has been applied, perform an adhesion test. Gently scratch a small, inconspicuous area to ensure the coating is well-bonded and does not peel off.

Cleanliness
Ensure the parts are free from dust, fingerprints, or residues. Use a soft, lint-free cloth to clean the surfaces before the final inspection.

Final Inspection
Conduct a comprehensive final inspection, considering all previous checks, to ensure that the transparent resin parts meet the desired quality standards and specifications.

FAQs

Check out the frequently asked questions of transparency.

  • What steps are involved in achieving transparency in resin 3D prints?-
    Achieving transparency involves several post-processing steps: initial sanding with coarse-grit sandpaper, progressive sanding with finer grits, polishing with a compound or liquid polish and applying a glossy clear coat. Proper curing under UV light is also essential for a durable, clear finish.
  • How do you prevent bubbles or imperfections during the transparency process?+
  • What materials are best for achieving transparency in 3D prints?+
  • How does the clear coating process enhance transparency?+
  • What applications benefit the most from transparent 3D prints?+

to get the paint Color Chart.

Cookie Policy

3DSPRO collect cookies on your computer to provide more personalized services to you. By using this website, you consent to the cookies we use and our Privacy Policy

Accept