In this guide, we will help you use our Squote easily to get the accurate 3D printing cost. Let’s get started!
Sign in, Sign up
To get an instant quote for your 3D models, please sign in or sign up first.
For New Users
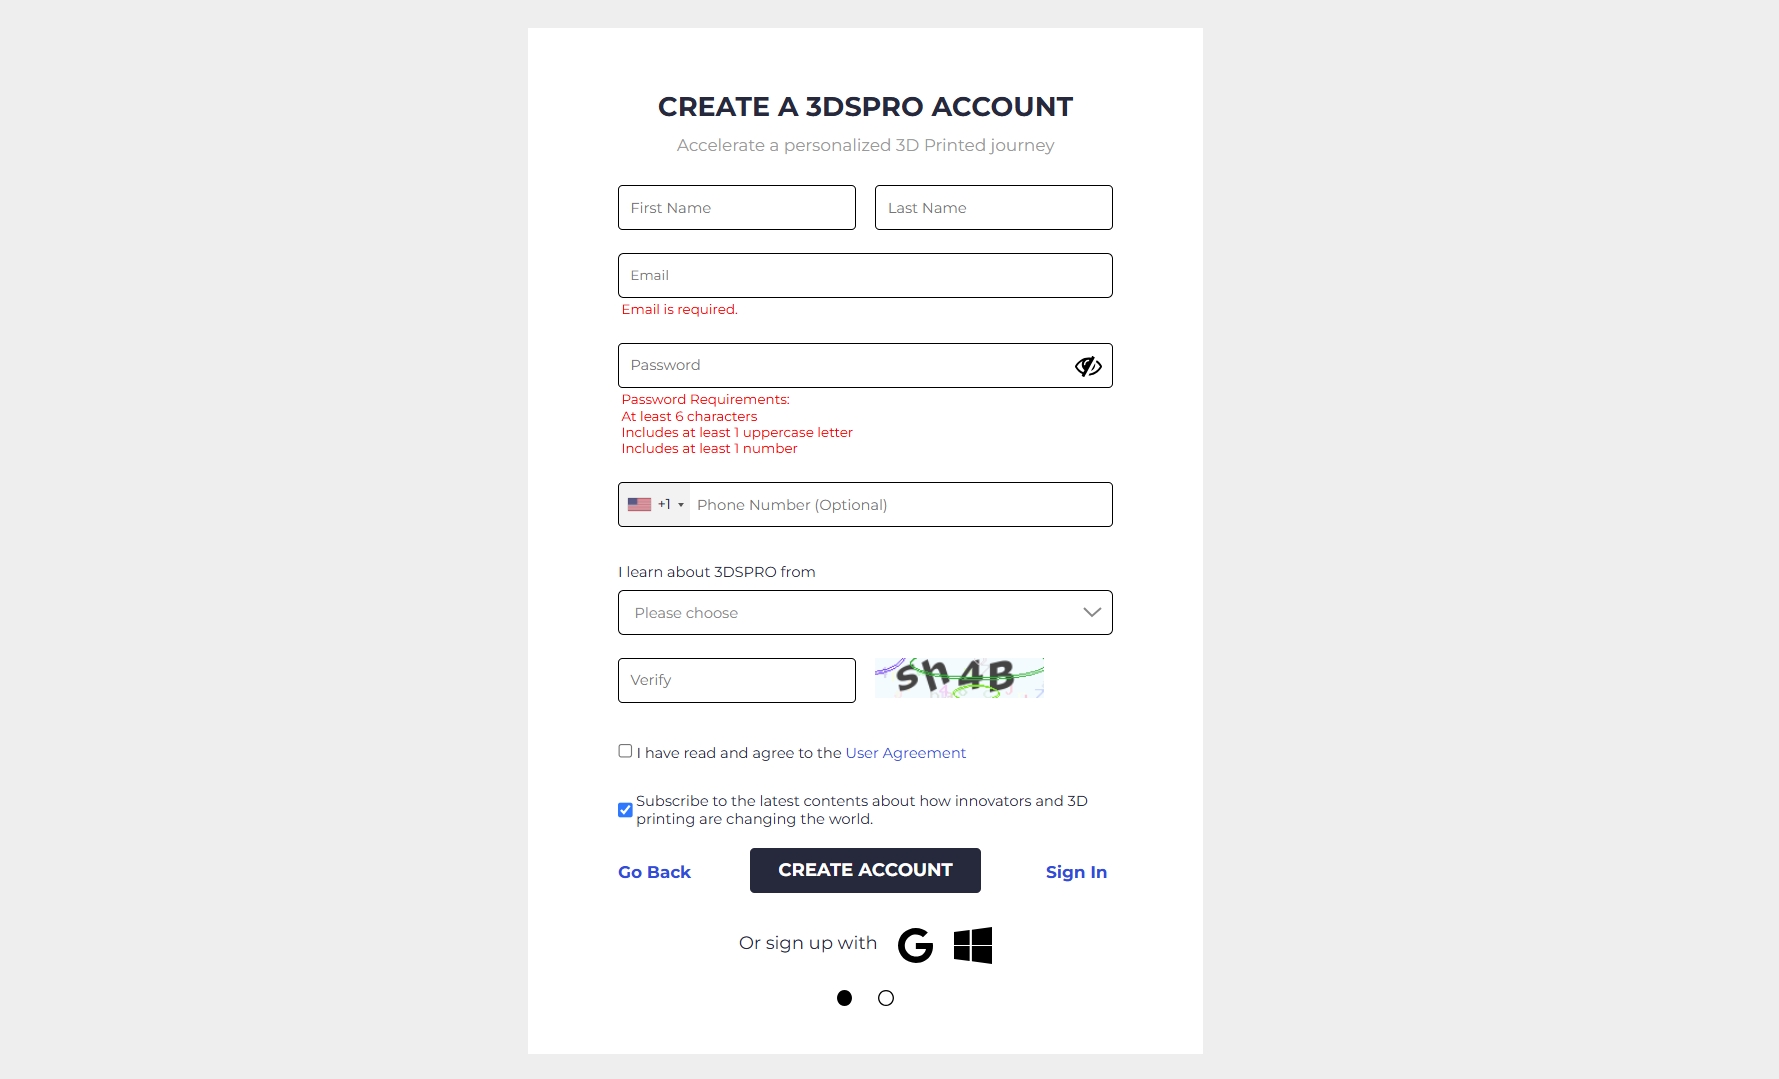
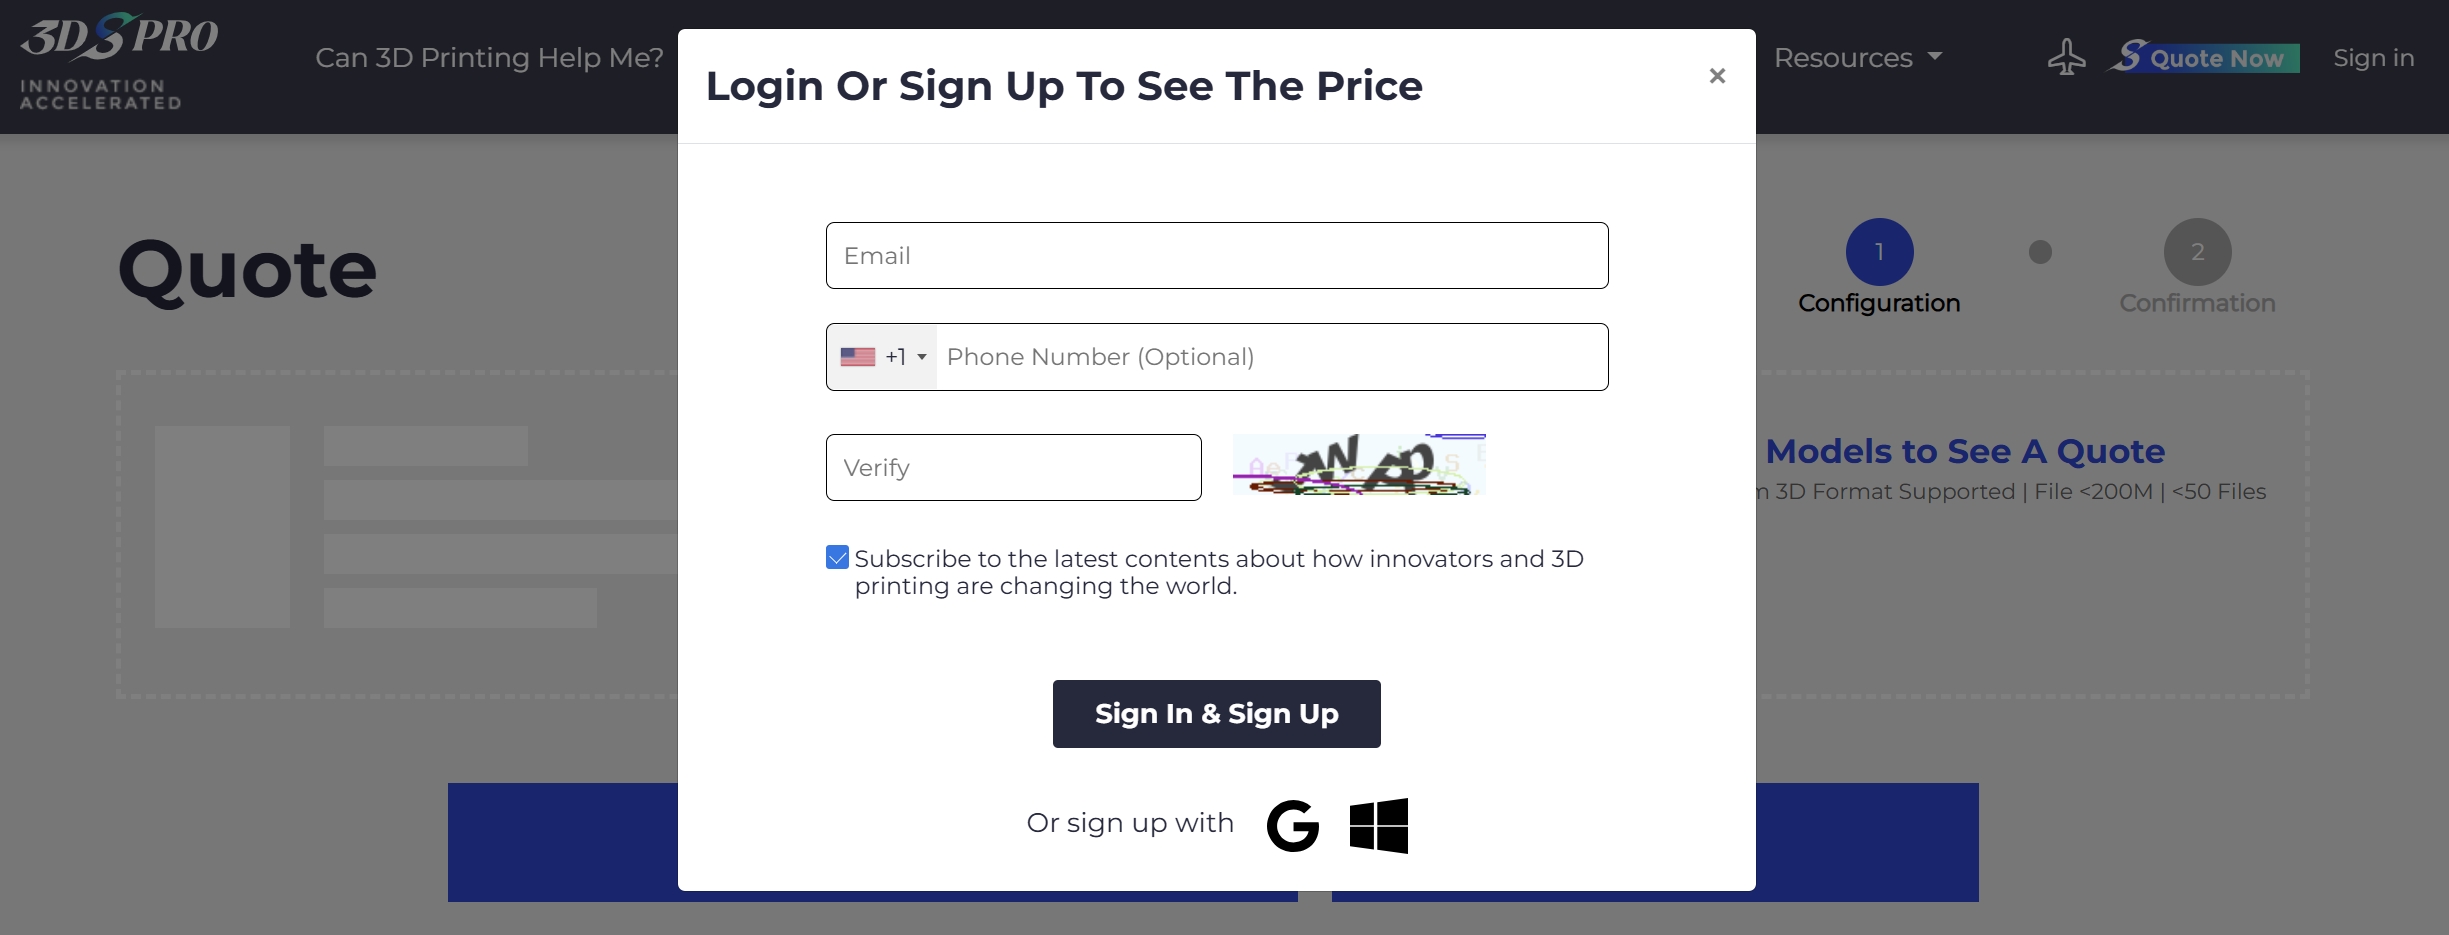
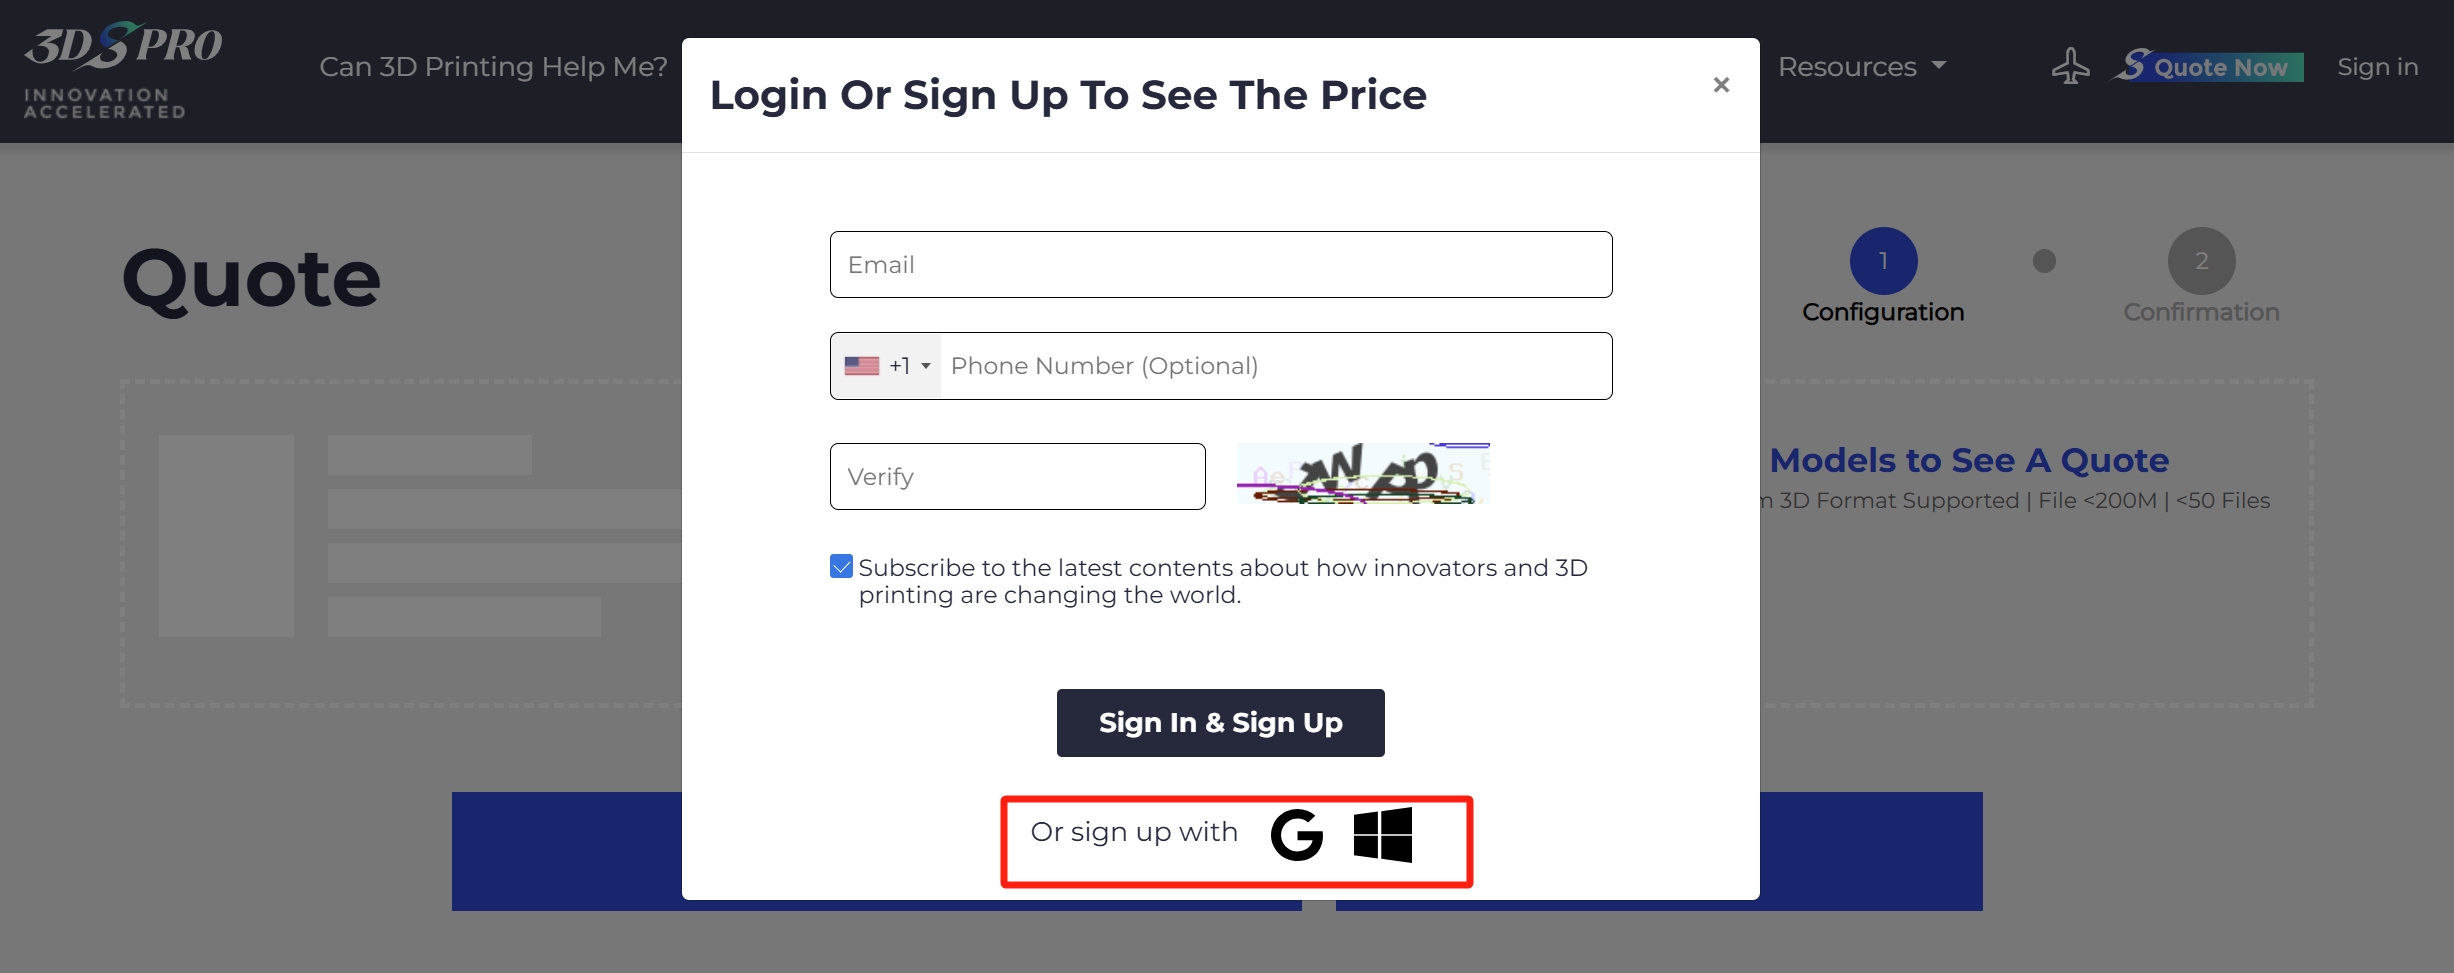
There are three quick and easy ways to check the 3D printing price:
1. Create an account: gain access to a full range of features and benefits.
2. Simply leave an email address: get quick quotes in the fastest way.
3. Sign up with a Google or Microsoft Account: use your existing credentials for a seamless experience.
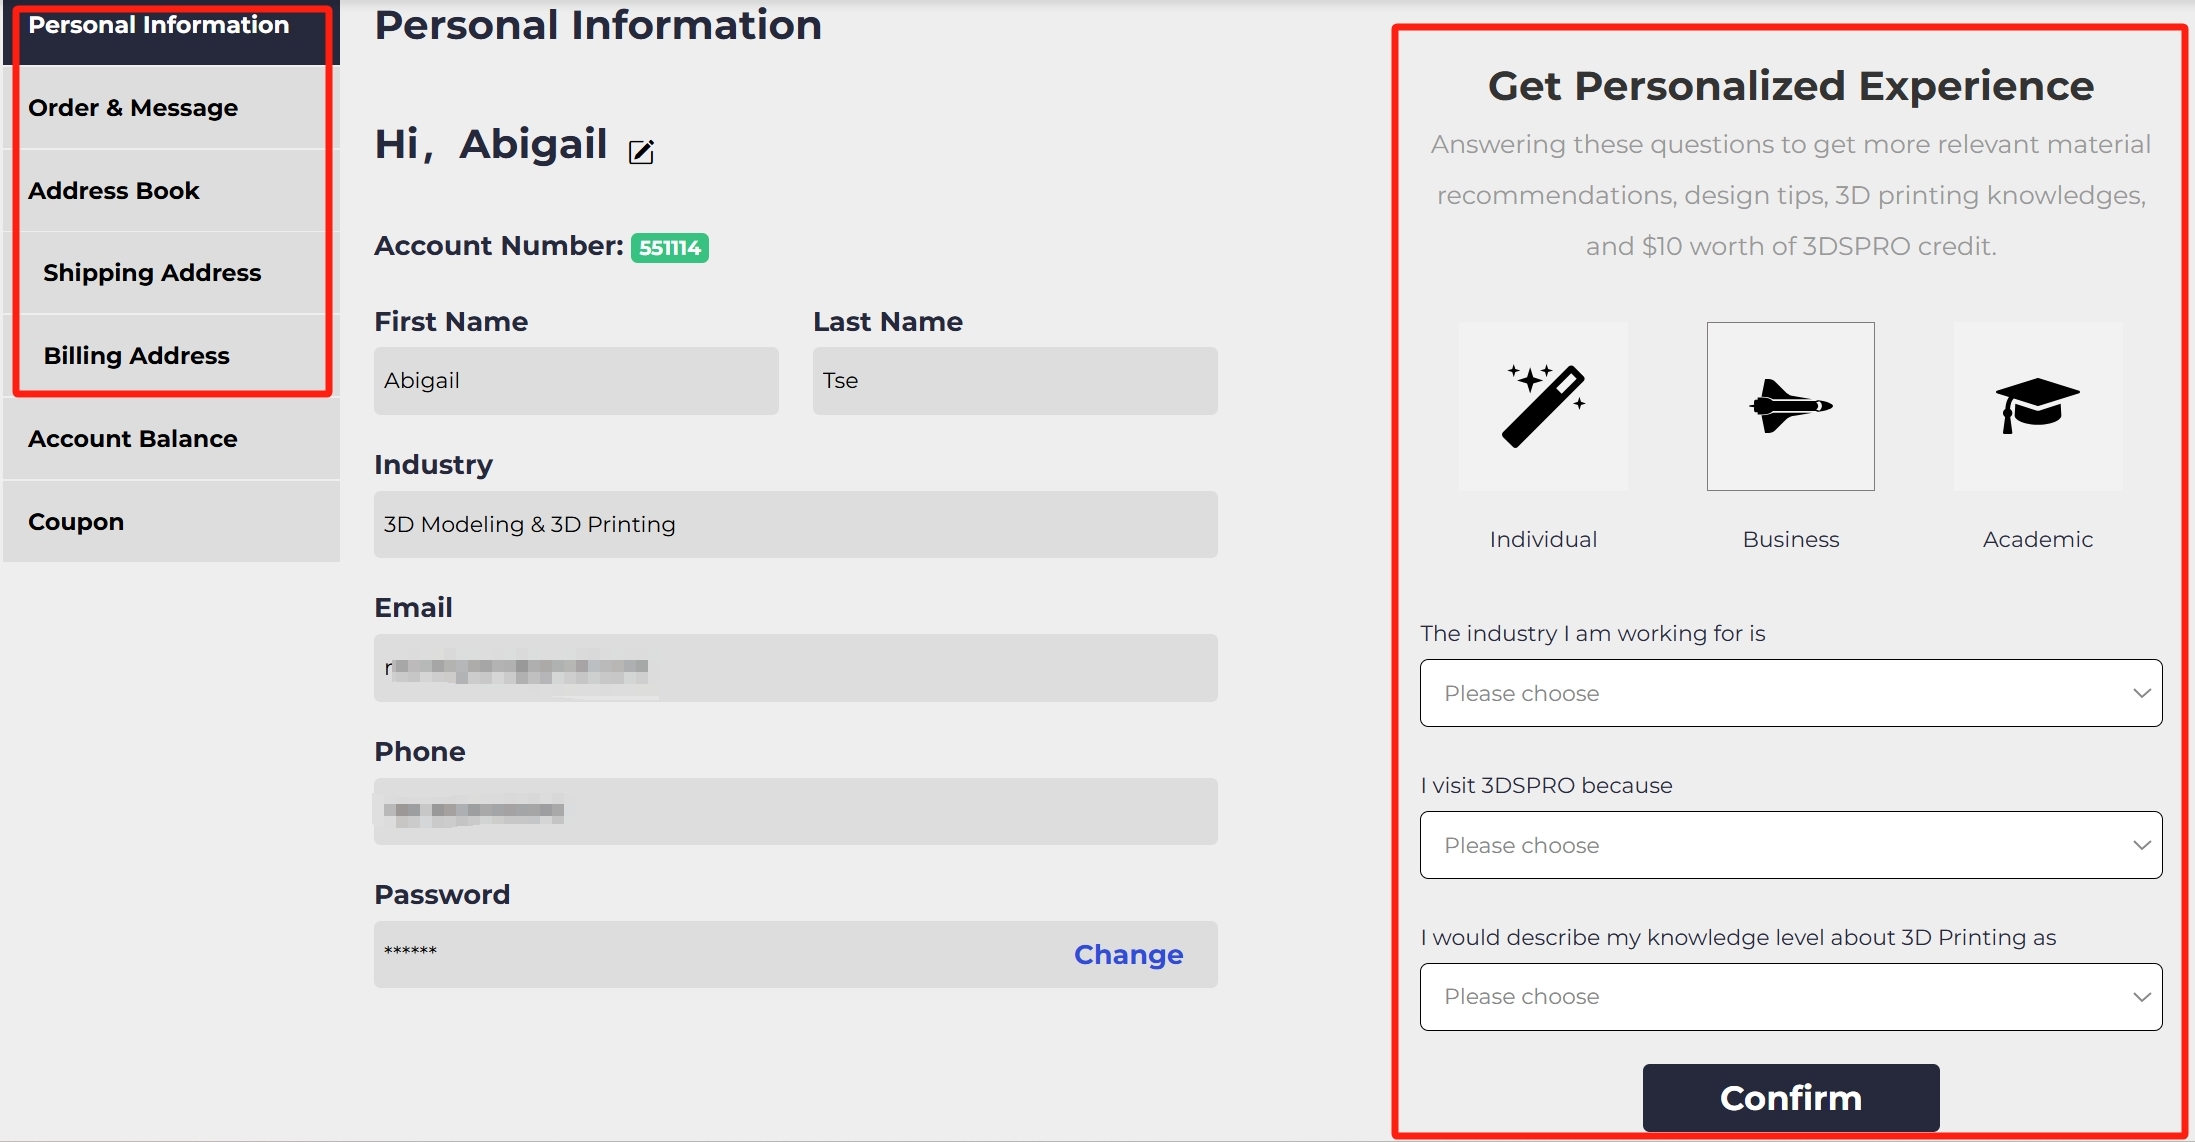
We highly recommend new users create and activate an account to access exclusive coupons in the user center.


After activating your account through the confirmation email, you can complete your personal information to streamline the order placement process after receiving a quote. Alternatively, you can fill in your personal details while making a payment.
If you need any further assistance for this step, feel free to reach out!
Upload 3D Models
Once you have an account, you can begin uploading your 3D models. We support a wide range of 3D printing file formats, including STL, STP, STEP, glTF, OBJ, FBX, DAE, 3MF, BREP, GCODE, SolidWorks, etc.

After successfully uploading your 3D files, you will see an interface similar to the image below.
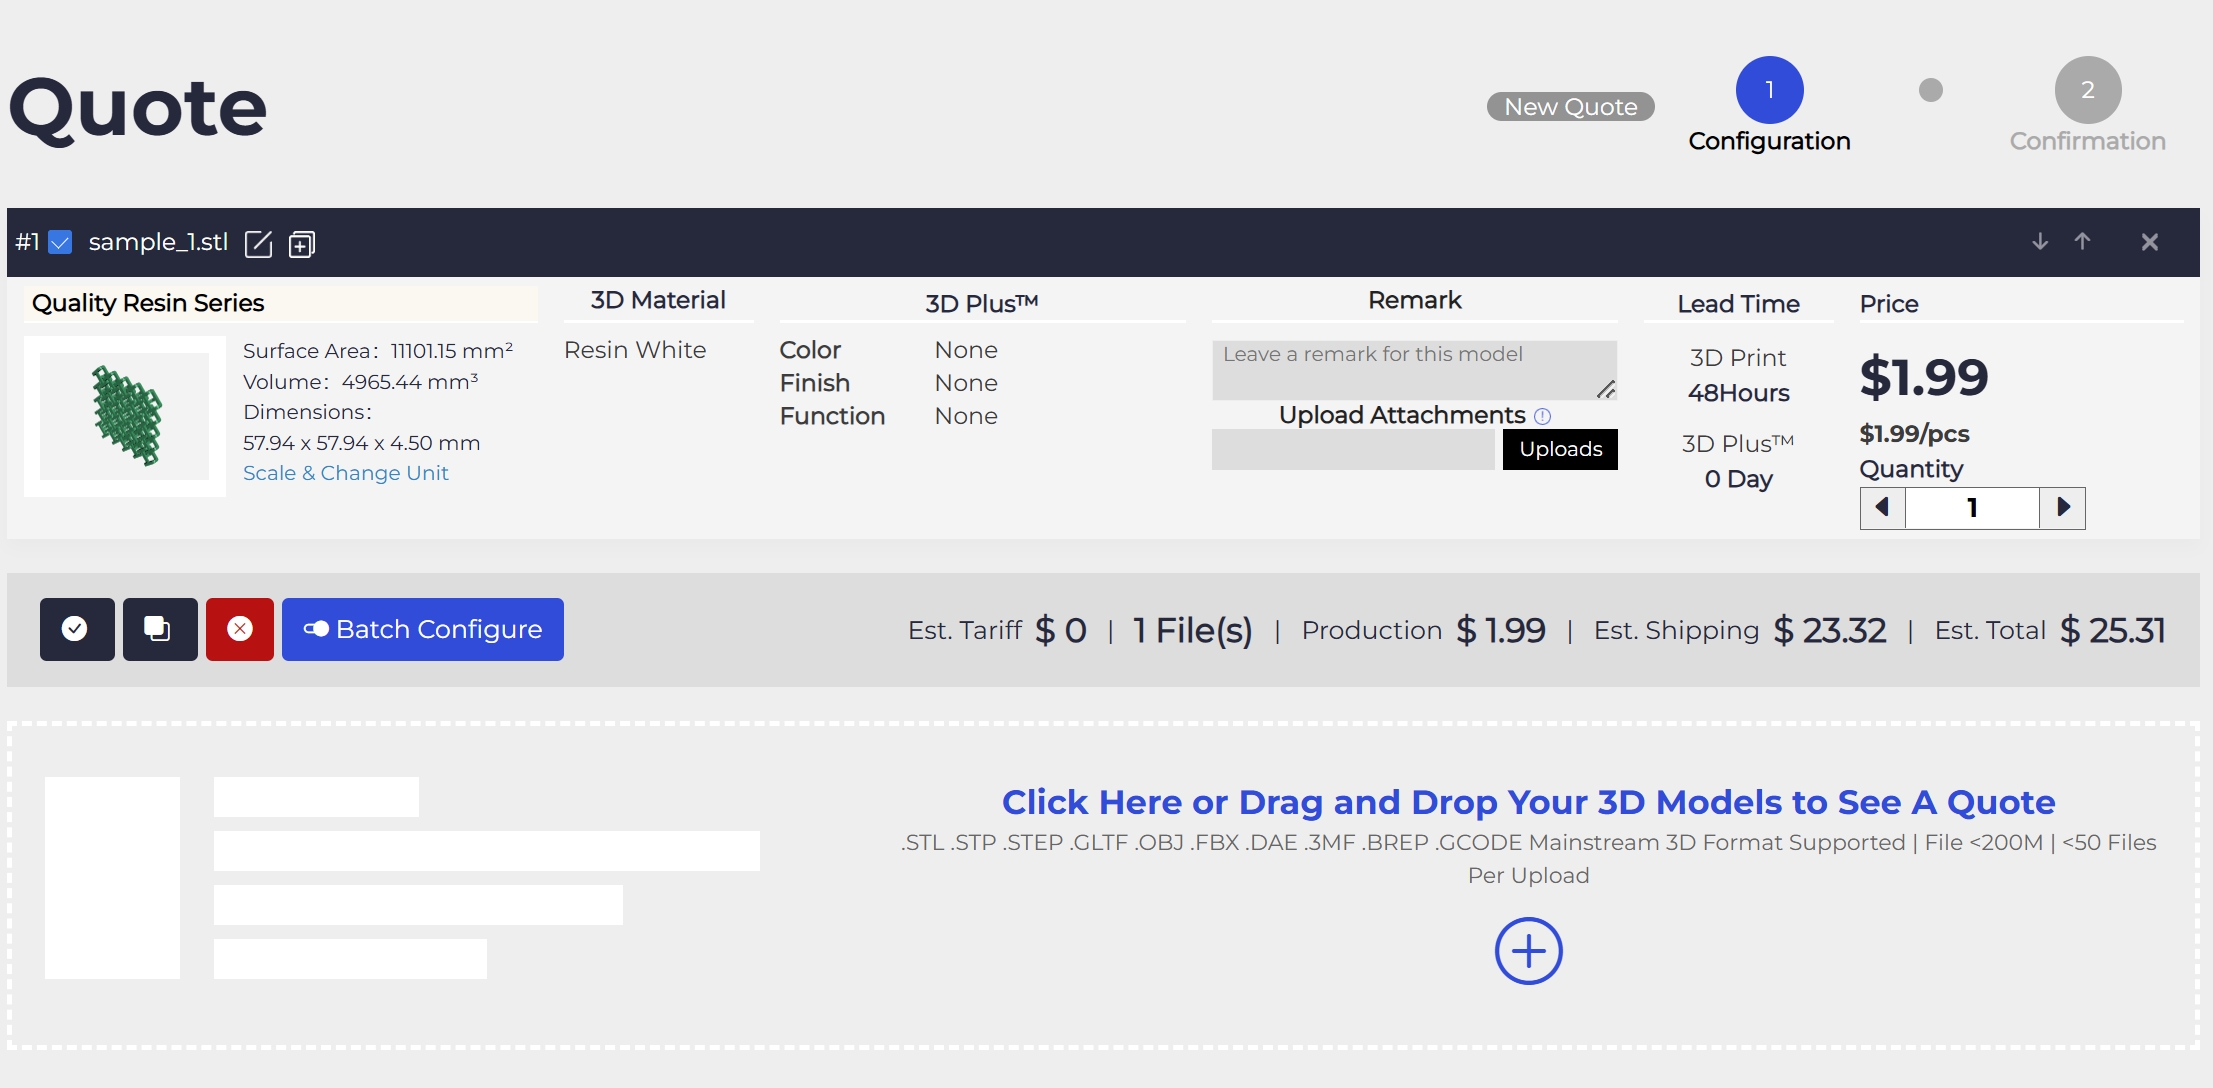
Here’s a breakdown of the information you’ll find on this interface:

1. Model Thumbnail: Click on the thumbnail to preview your 3D model.
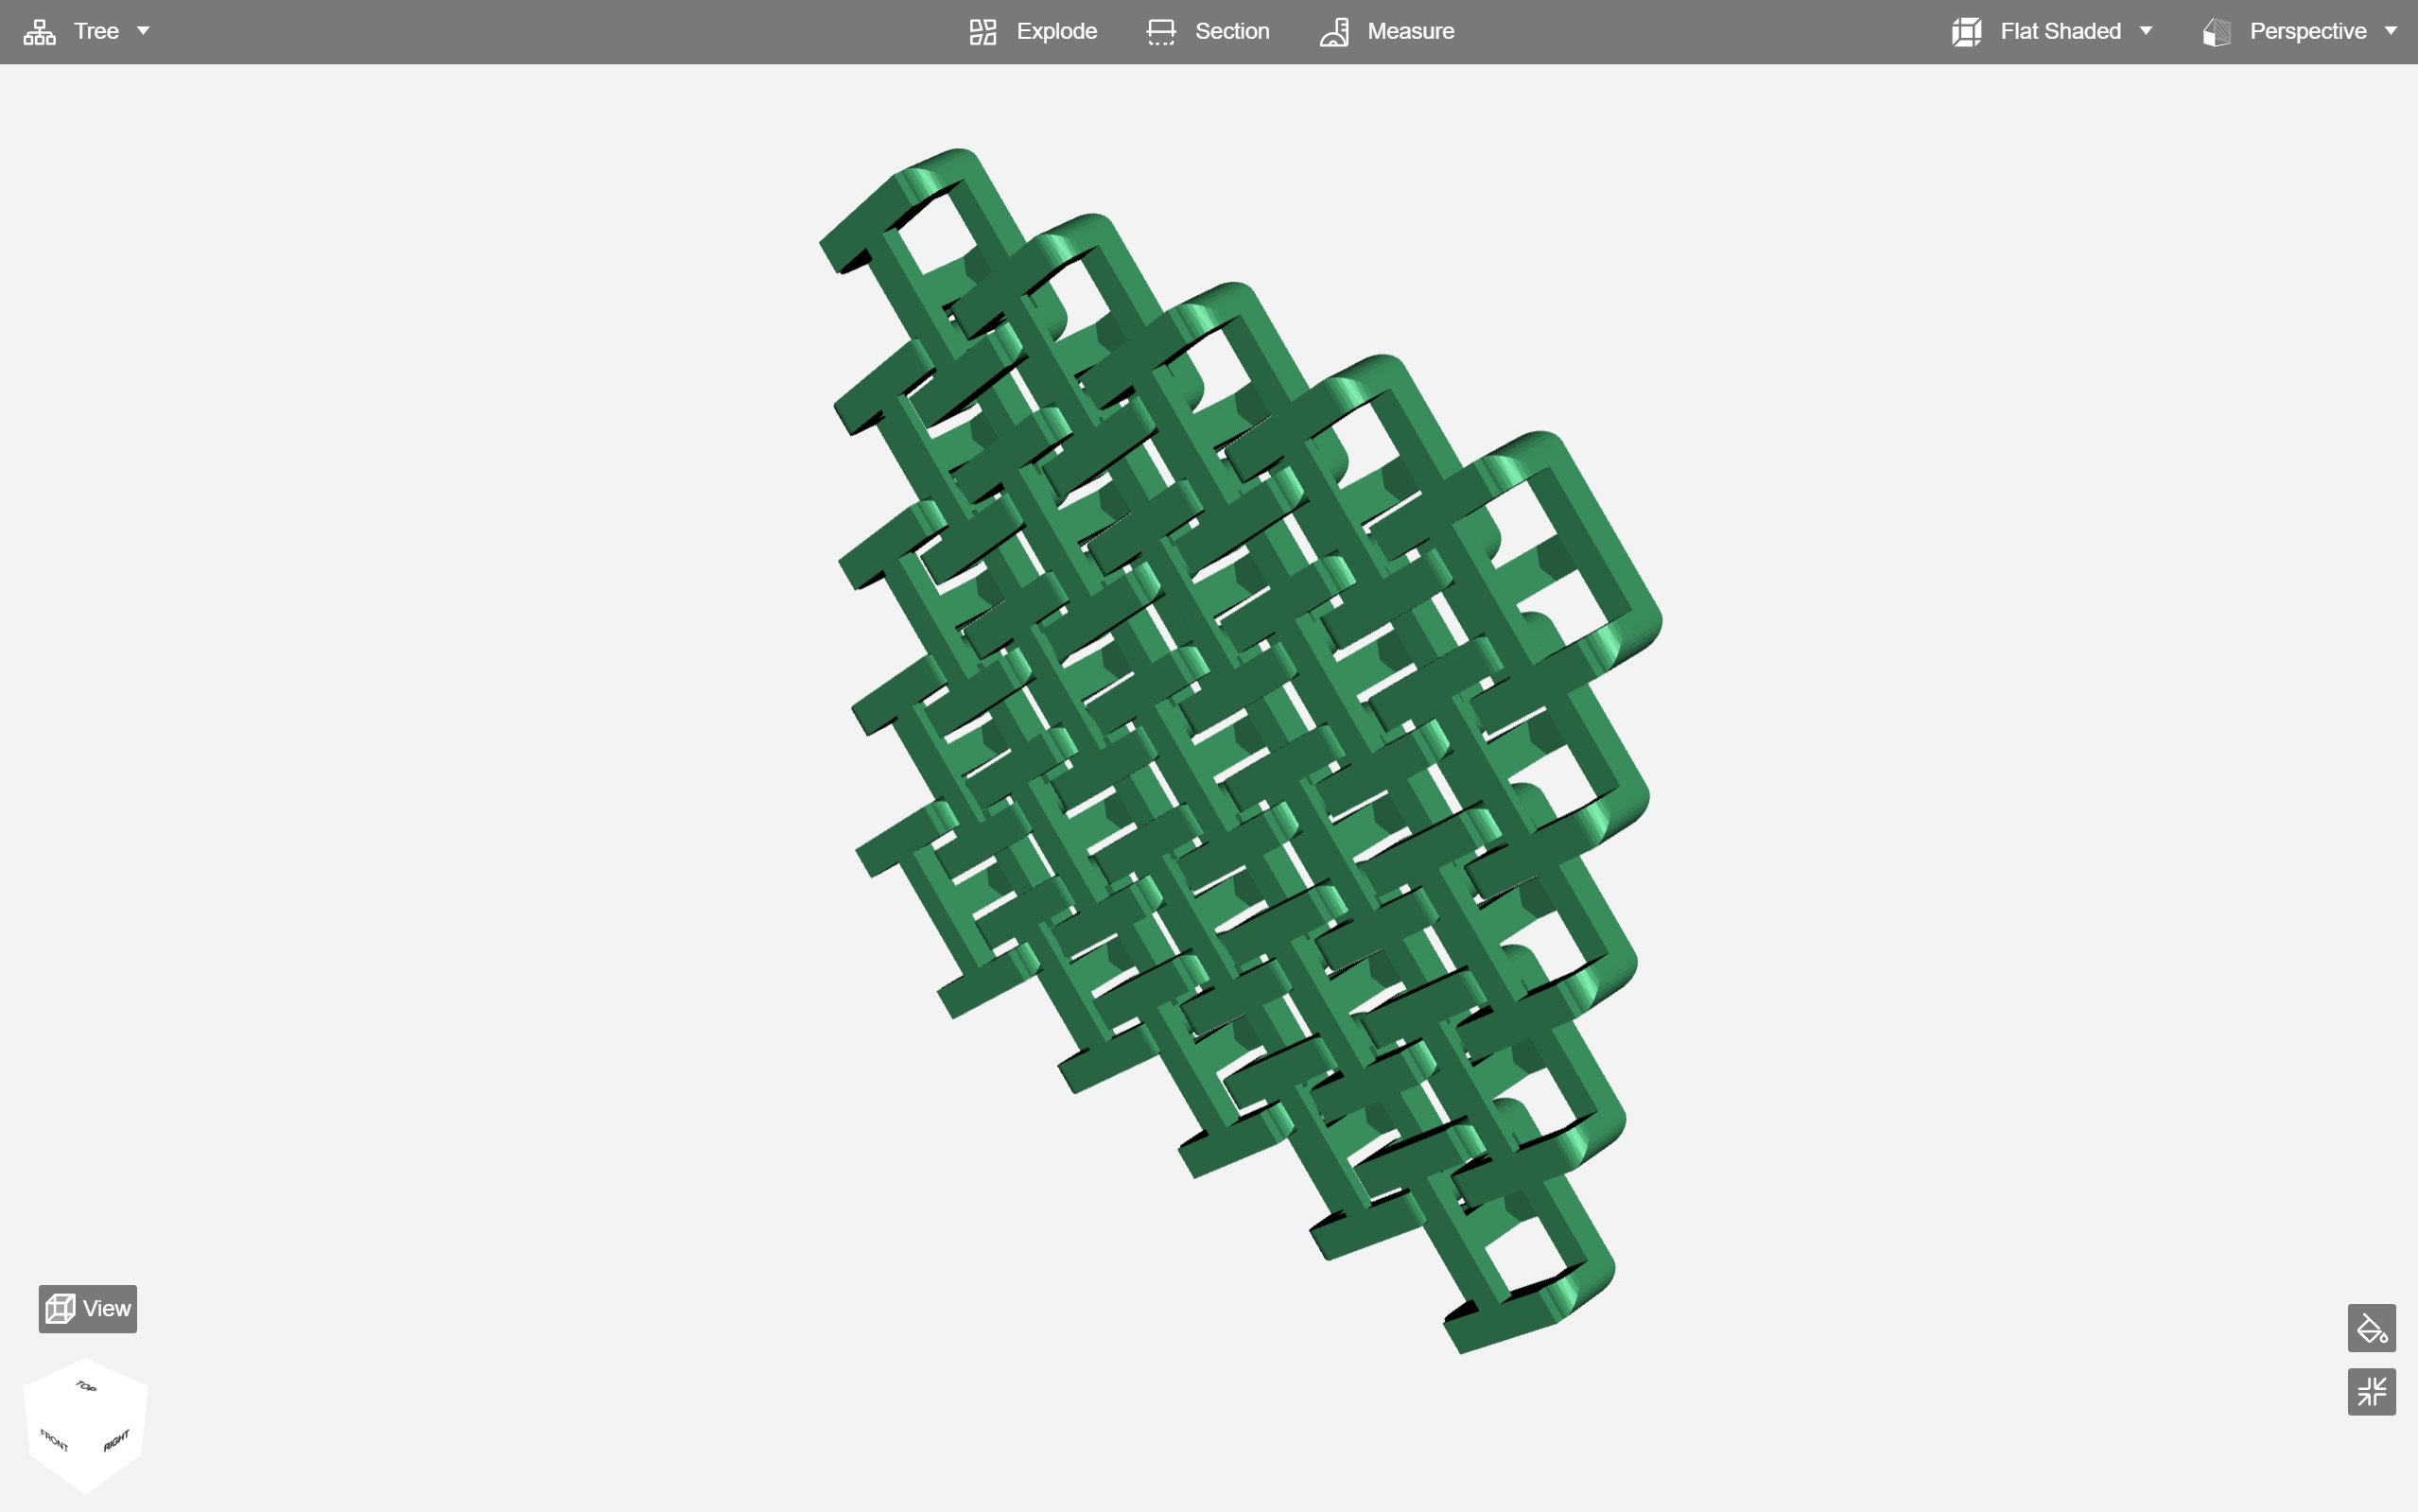
2. Basic Information: View details such as surface area, volume, and dimensions of your 3D model.
3. Scale & Change Unit: Click this option to adjust the scale of your 3D model.

4. 3D Material: The default material is Resin White. You can change it if needed; we offer over 20 types of materials.
5. 3D Plus™ Services: These post-processing services include options for color, finish, and functionality.
6. Remarks and Attachments: Leave comments or upload attachments for specific requirements.
7. Lead Time: Check the separate lead times for 3D printing and post-processing.
8. Total Price: View the total price for one unit.
9. Quantity: Edit the quantity if you need more than one piece.
The next step is to configure your 3D models.
Configure
Configure means setting up your 3D model with 3D printing materials, processes, and post-processing so that we can print your model to your specific requirements.
First, in the left corner, you'll find options to edit the file name and copy your files. These features ensure a seamless experience, especially if you need to test the same files with different materials.
More importantly, you'll need to click the Configure button to choose your 3D printing material, process, and post-processing options.
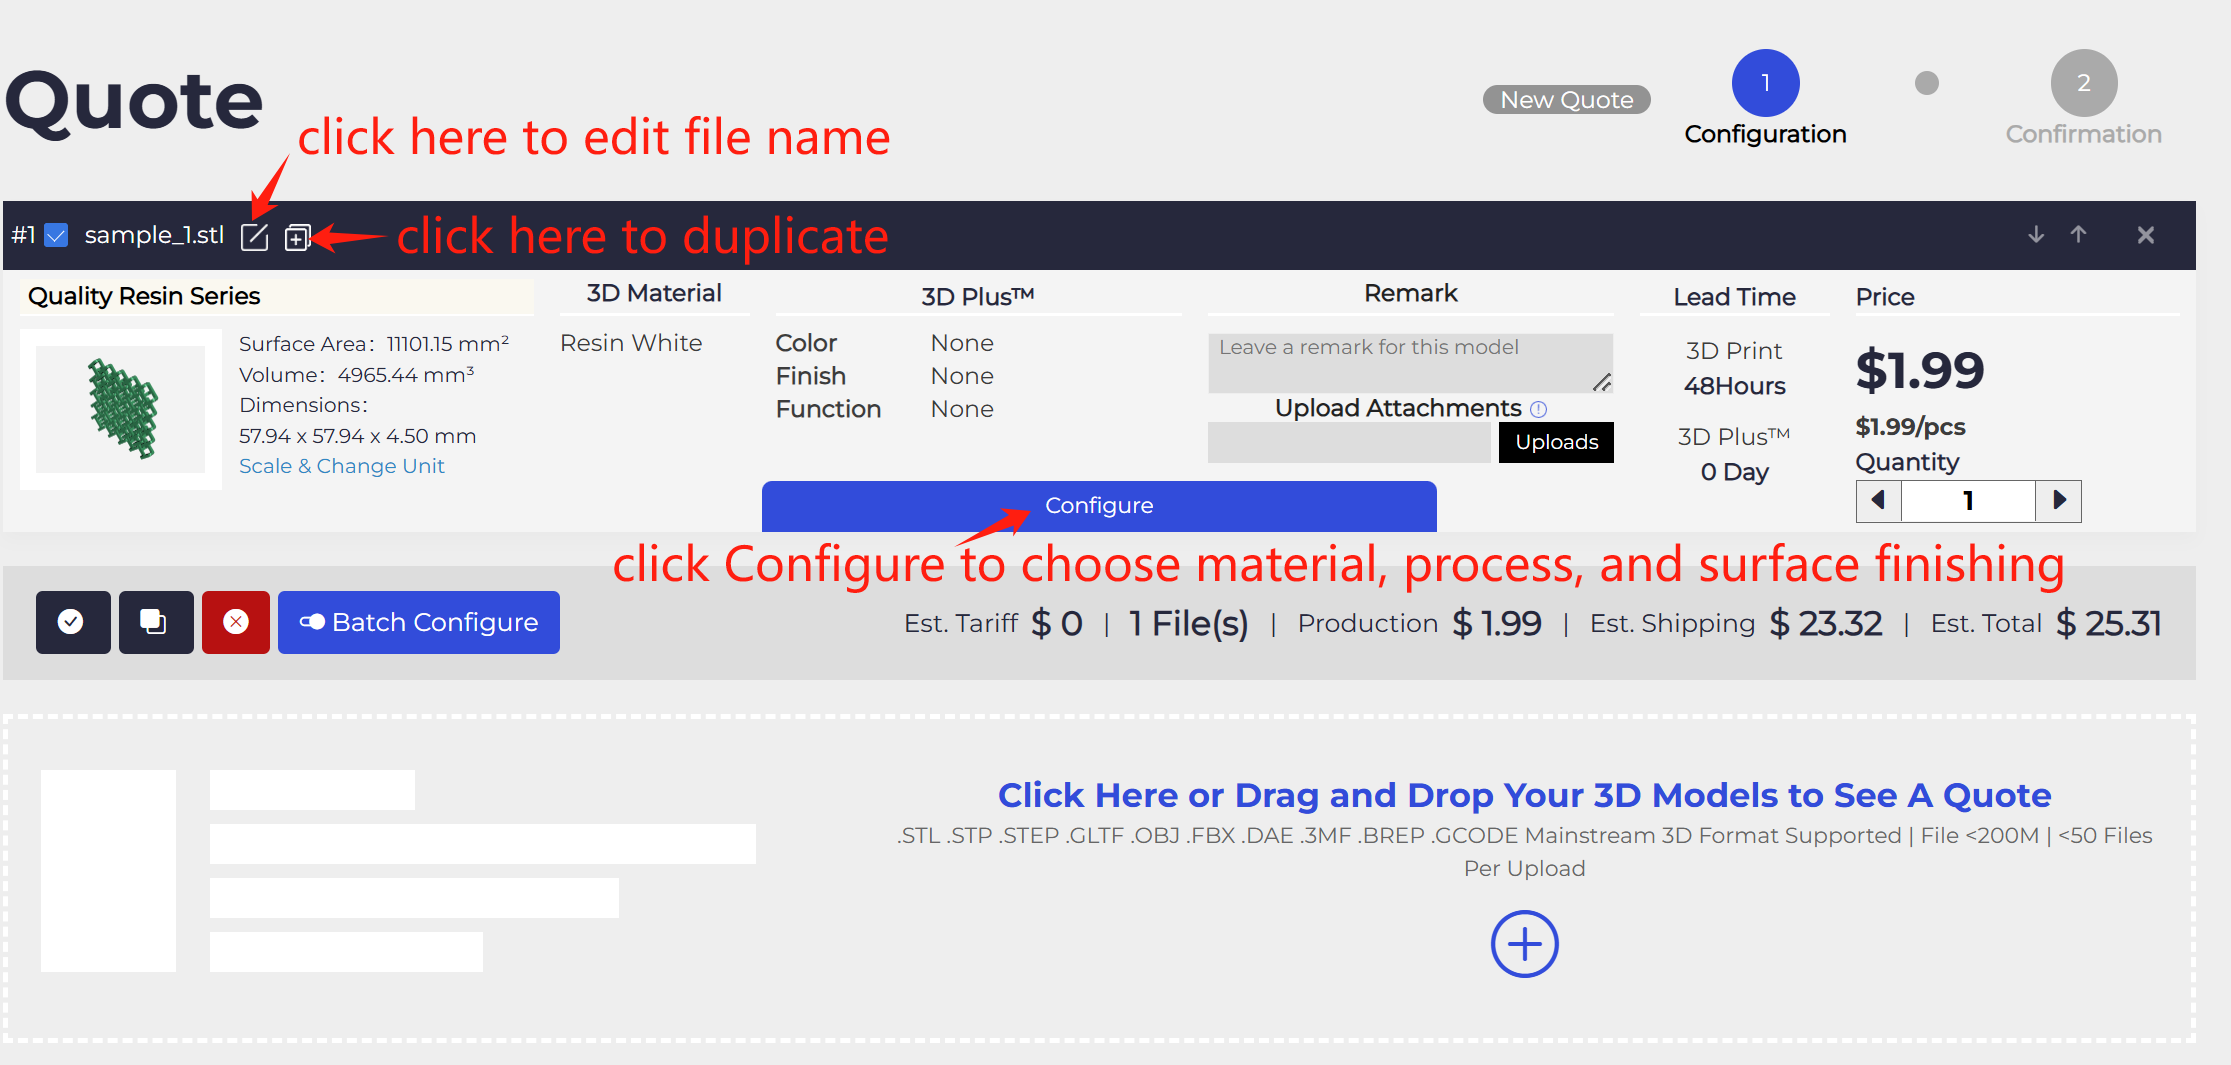
After clicking Configure, you will see the 3D printing price of your model with the default material Resin White and the SLA (Stereolithography) printing process. If Resin White is not your desired material, you will need to change the material accordingly. (Scroll down to see how to select other material.)
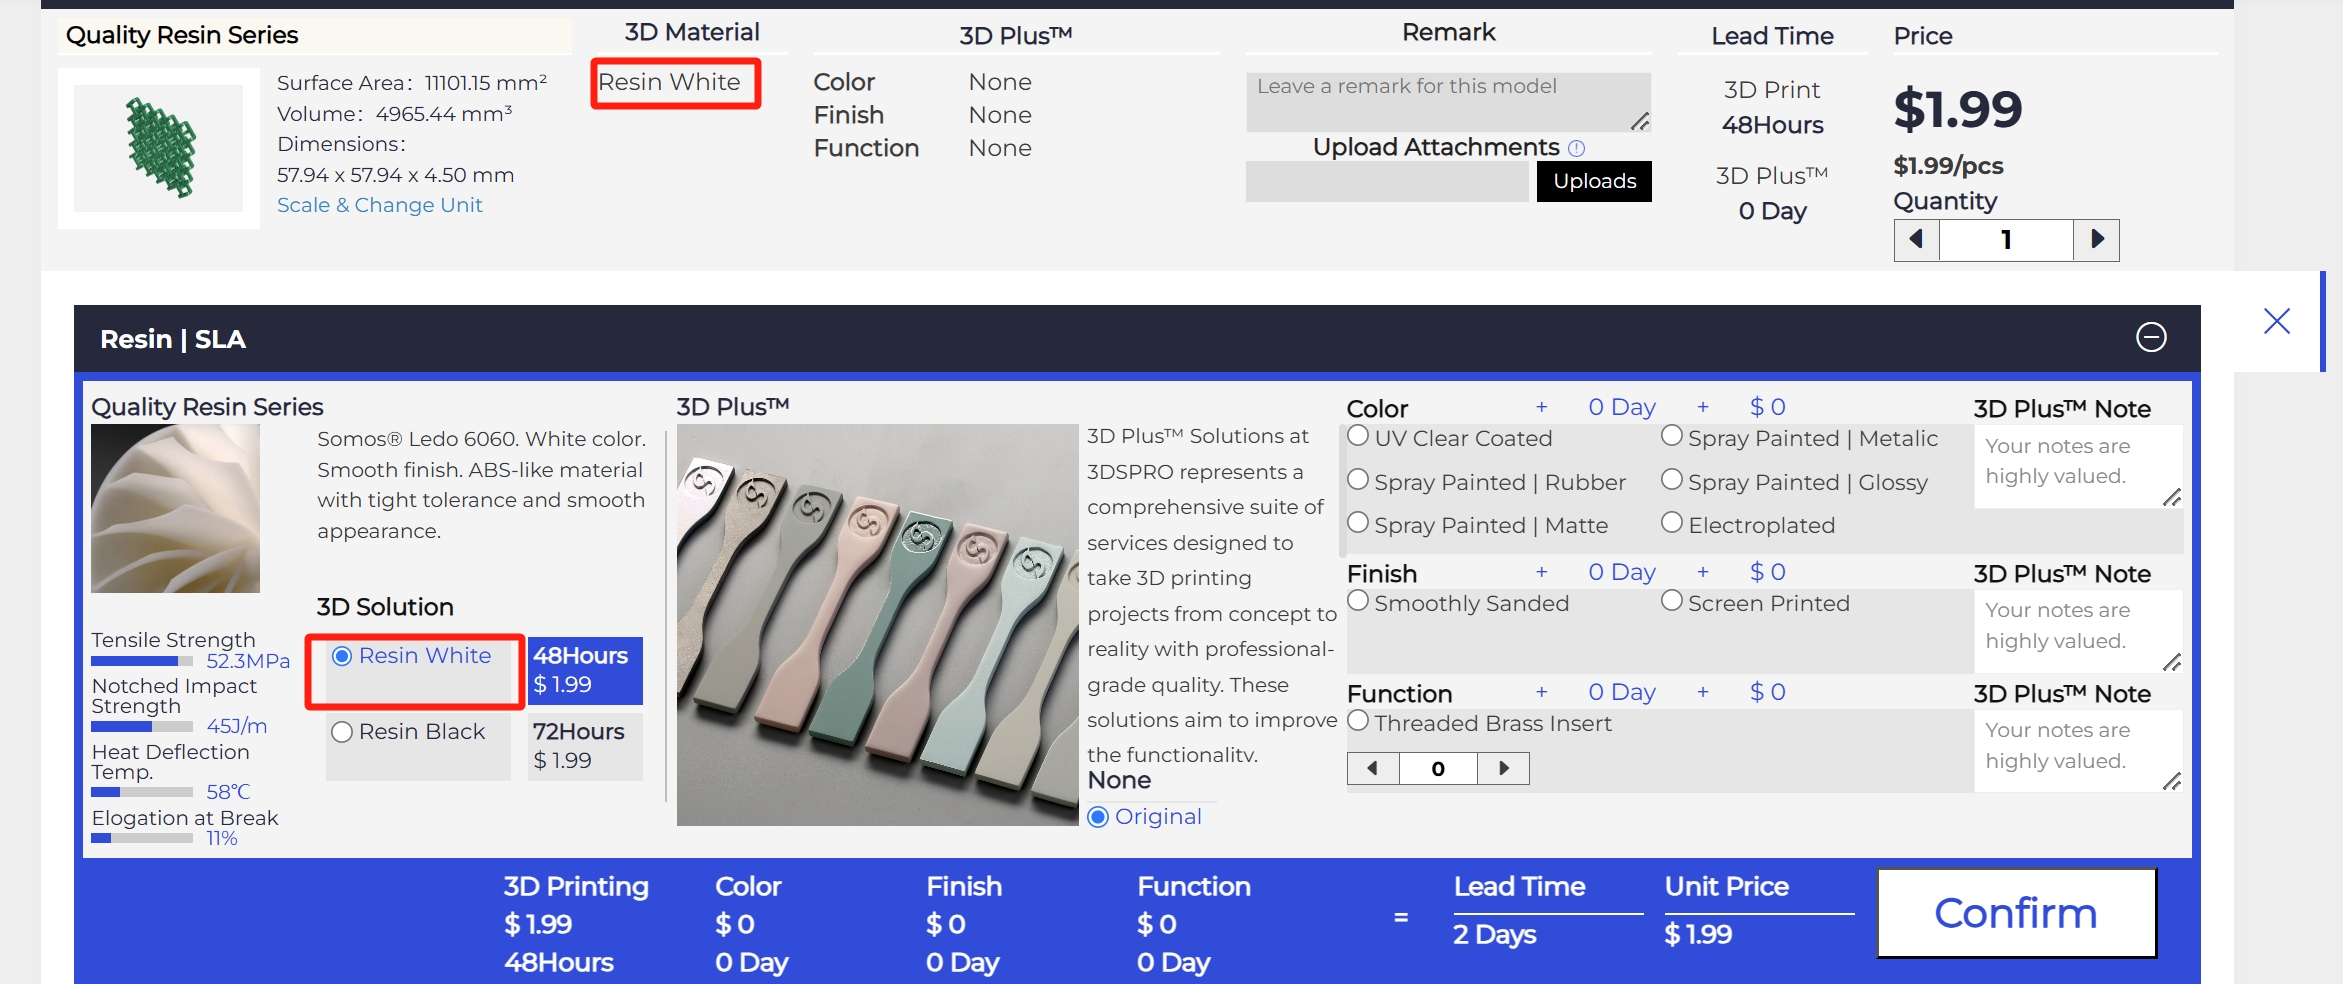
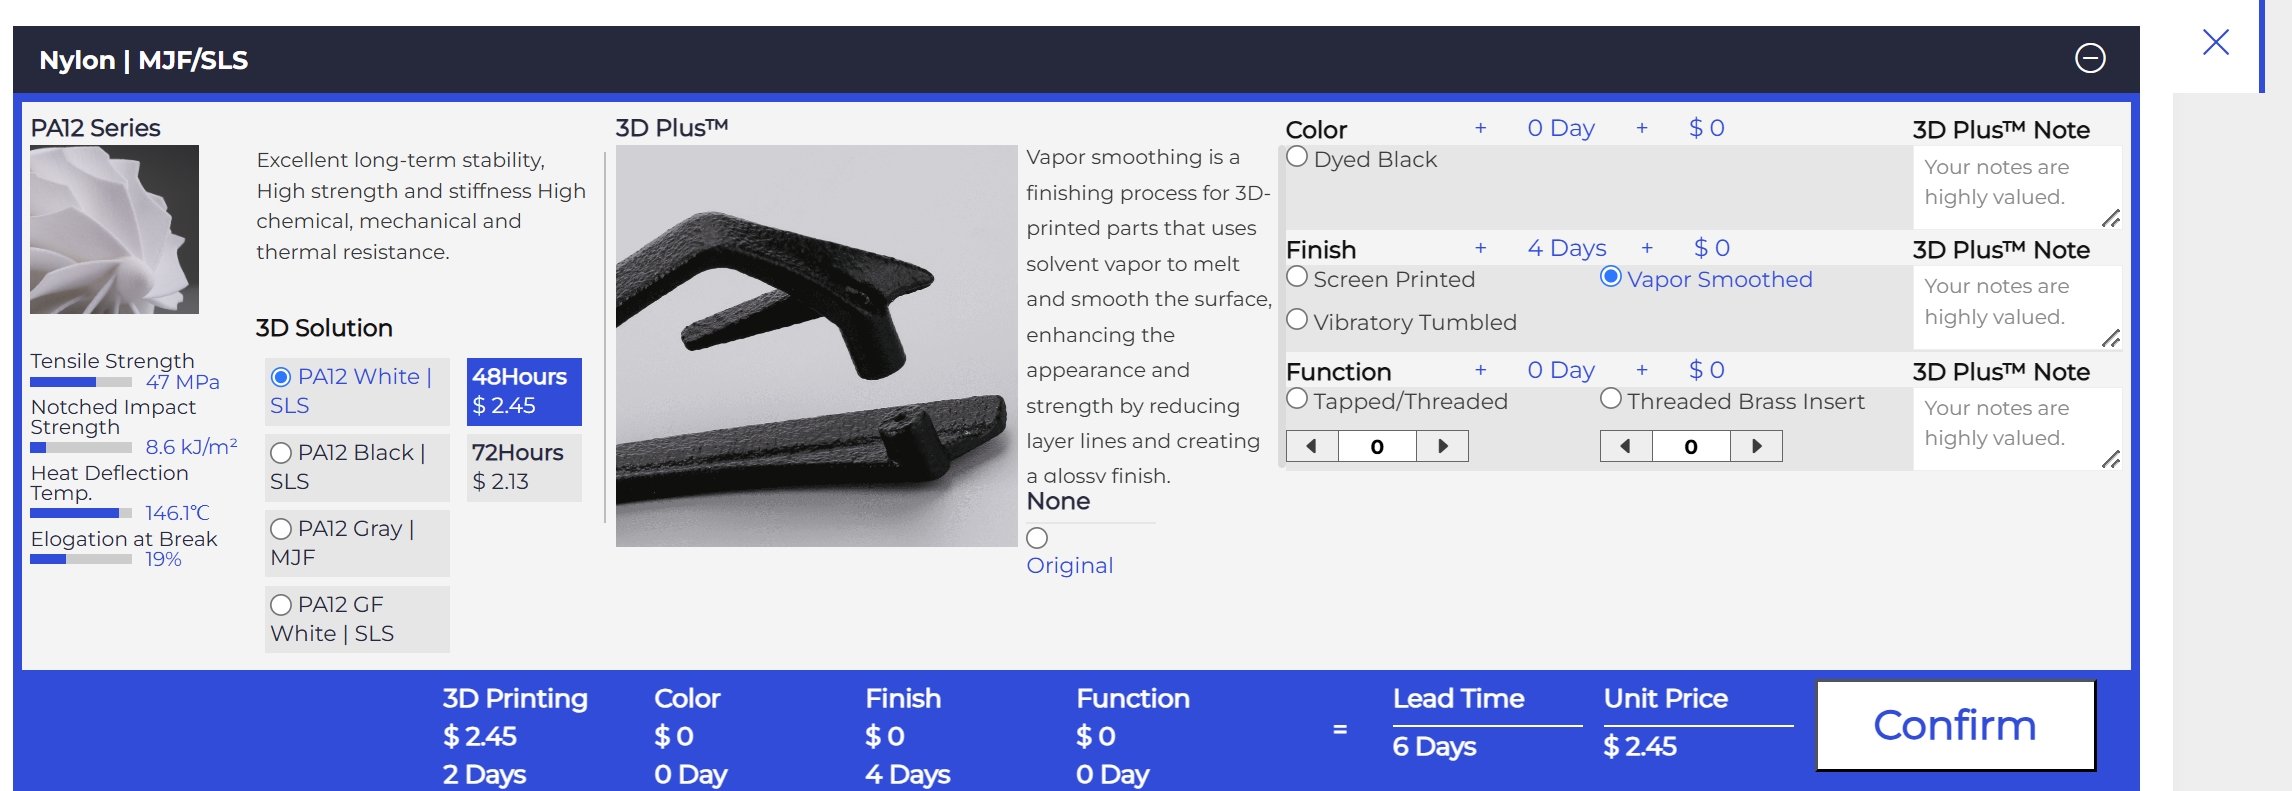
To help you understand the user interface, the quote can be divided into two sections: The Material Series (Quality Resin Series) and the Post-processing Options (3D Plus™).

Material Series:
Here, you can check a short introduction and properties of the materials available.
Choose from materials within the series. For example, under the Quality Resin Series, you might find Resin White and Resin Black.
Select the lead time for your chosen material.
Post-processing Options (3D Plus™):
3D Plus™ offers post-processing services to enhance your 3D-printed object.
Types include Color, Finish, and Function.
Check the appropriate options and leave specific notes in the provided box.
Once you have selected your material and post-processing services, you will notice changes in the blue bar at the bottom. This bar displays the service type, price, and lead time. Summing these up will give you the final lead time and unit price for your 3D model. By clicking Confirm, you are ready to proceed to checkout.
At this stage, you might be asking what to do if I want a material other than Resin White. Don't worry, if Resin White isn't the ideal material for your 3D printing project, click Configure button and keep scrolling down to explore four material categories along with their respective 3D printing processes. You'll see:


To Choose the Right Material:
- Pick the Material Series.
- You will see an interface similar to the one described but with different materials.
- Select the ideal material, lead time, and post-processing options.
- Click Confirm to move to the Payment stage.
Payment
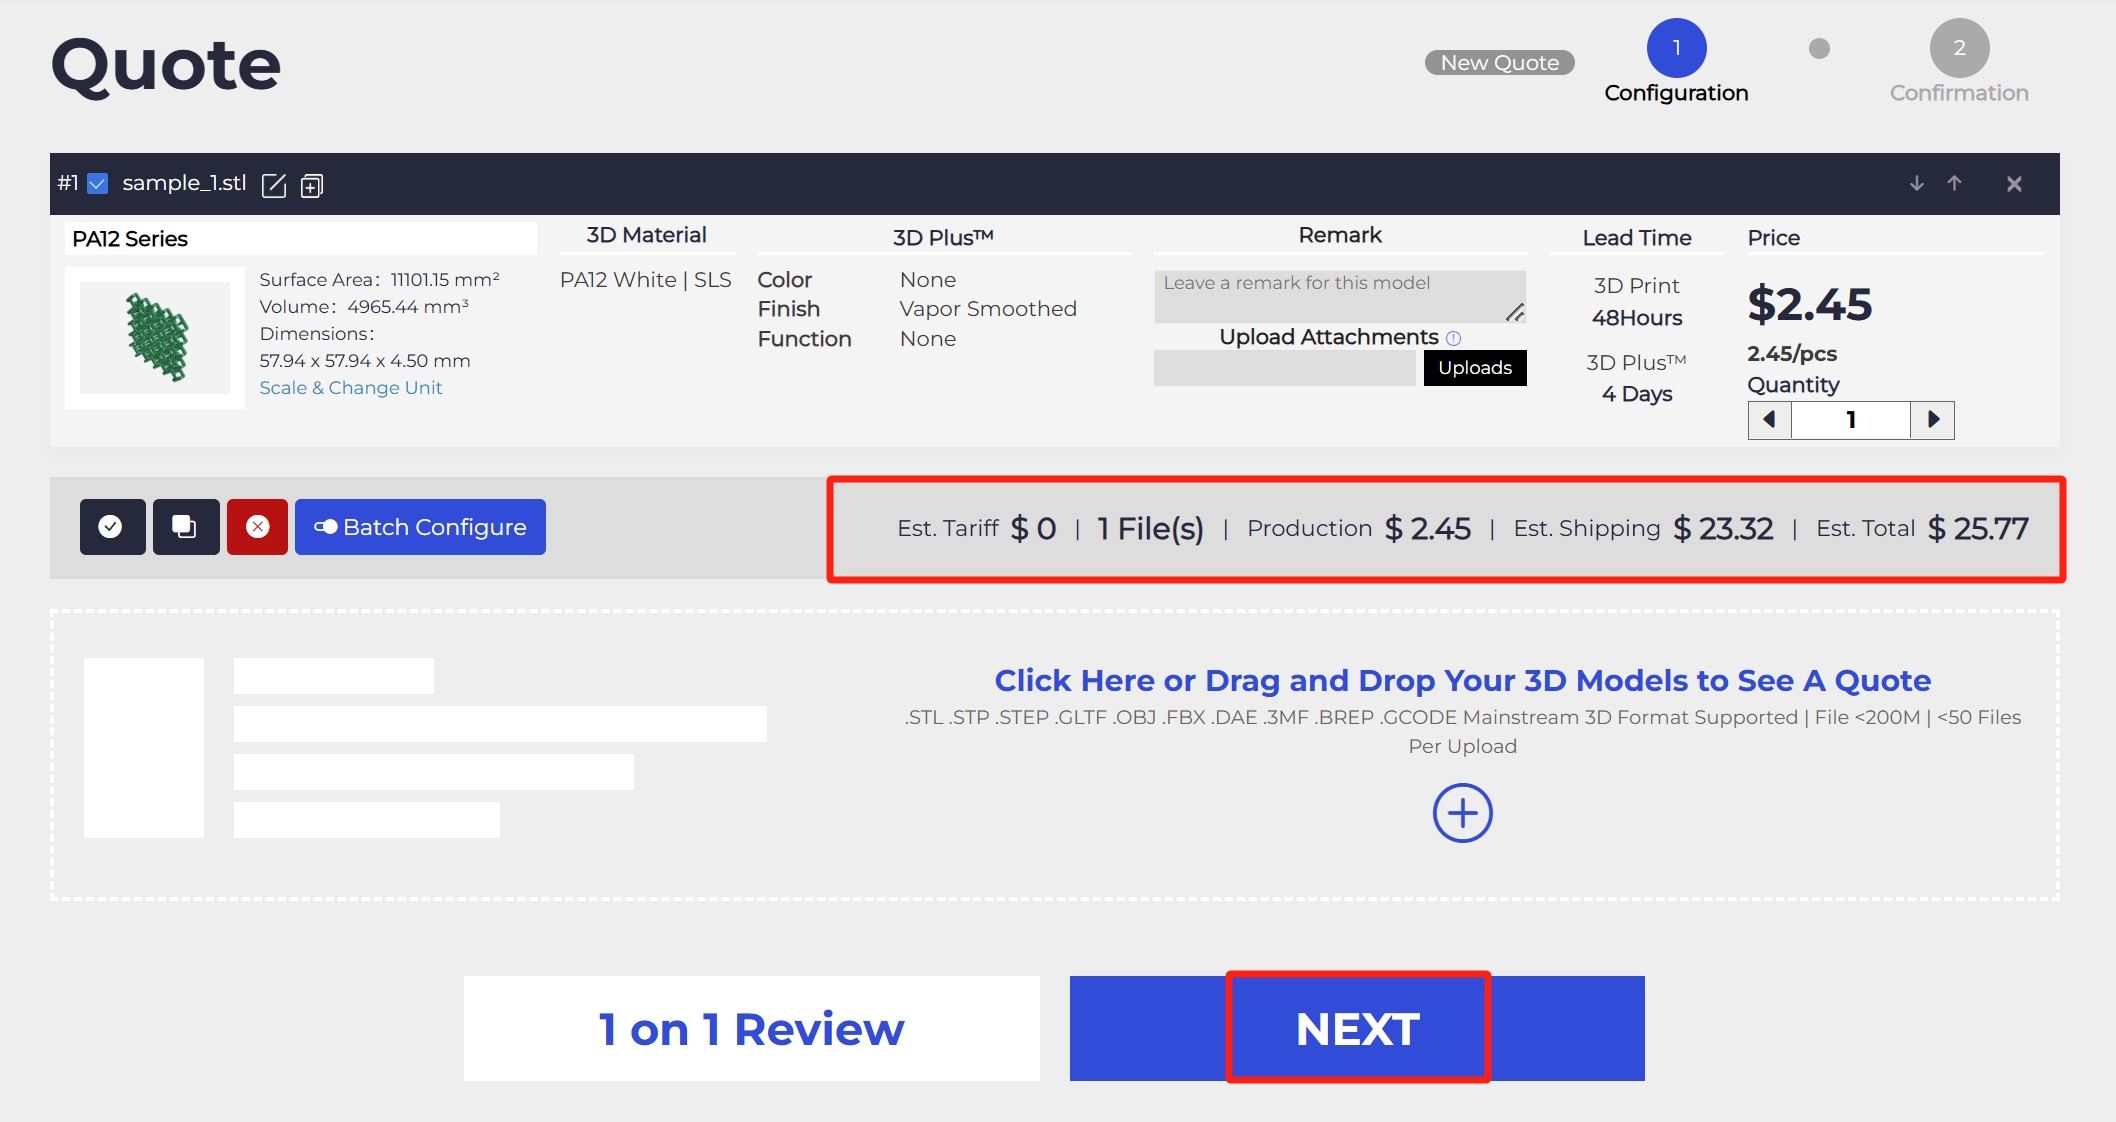
Once you've completed the configuration, you will see the total price, including shipping, as shown in the following image. Click NEXT to proceed to the payment page.
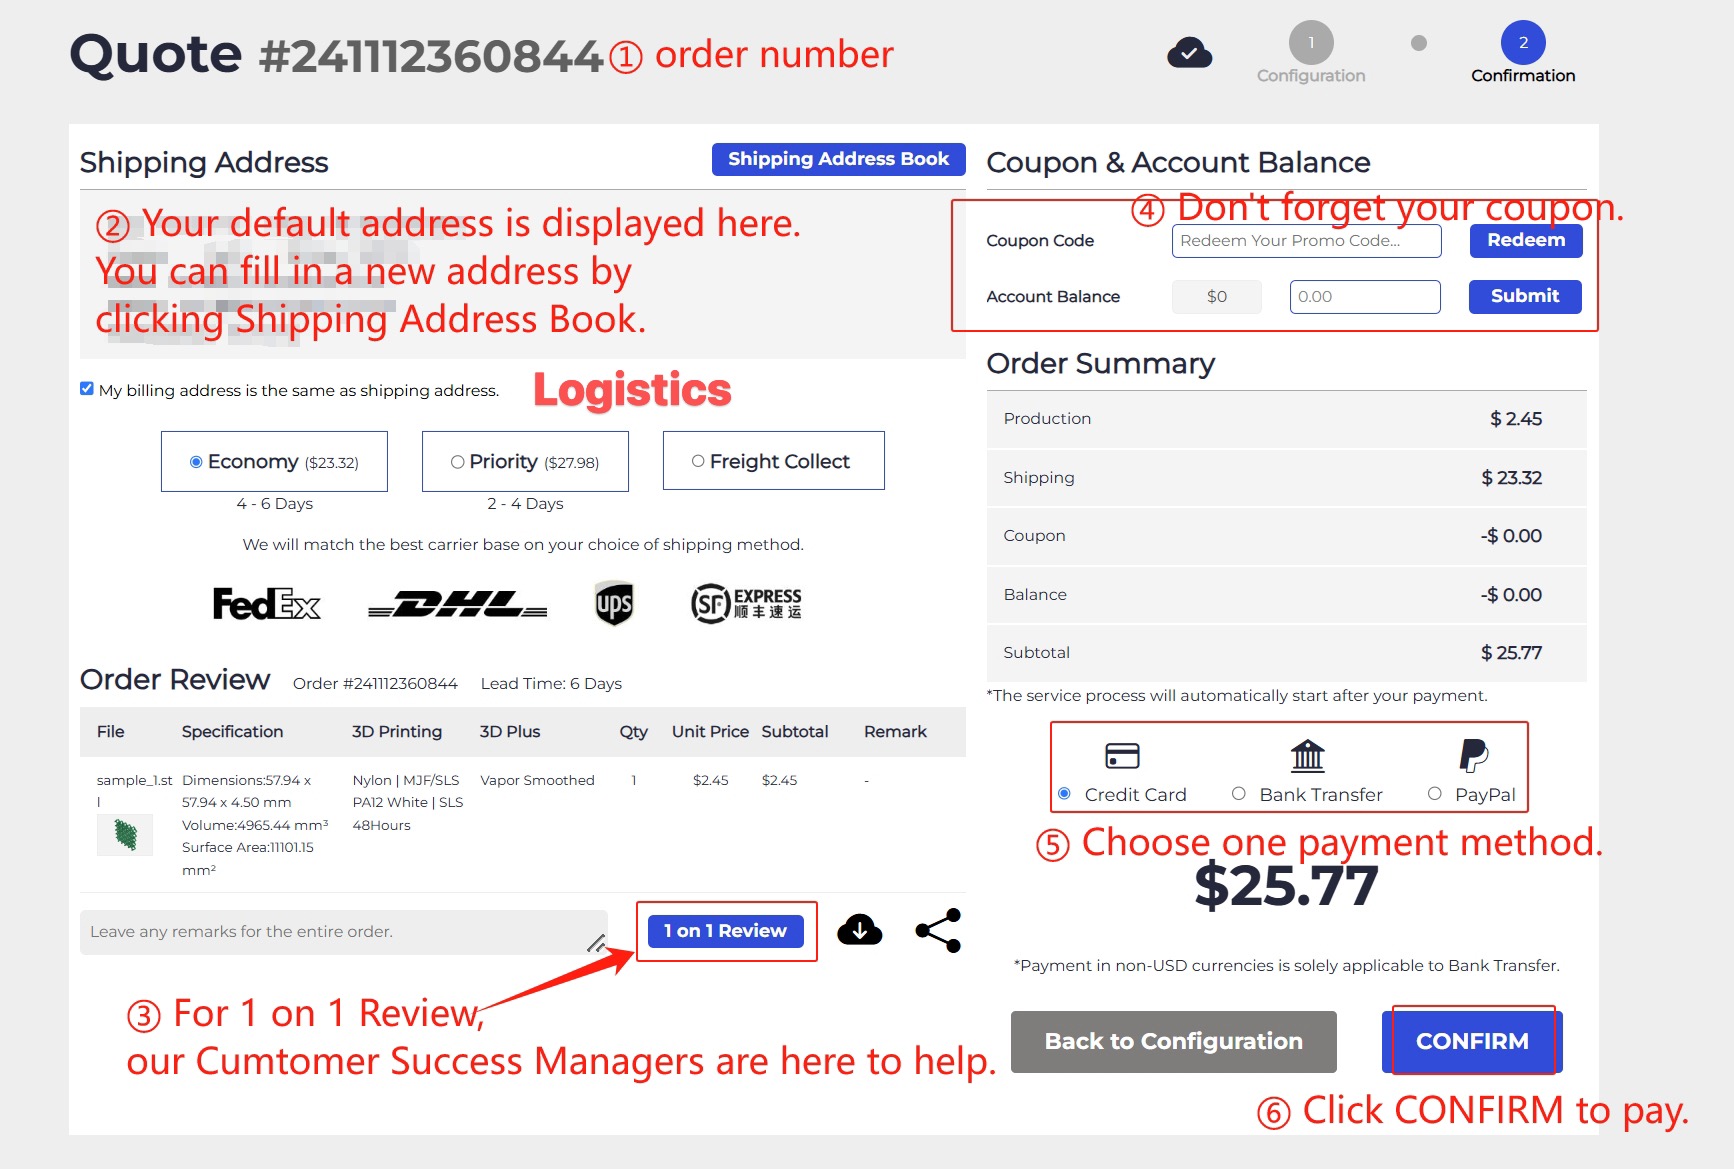
On the Payment page, you'll find several sections:
- Address: Enter or confirm your shipping address.
- Logistics: Select your preferred shipping method.
- Order Review: Review your order details.
- Coupon and Account Balance: Apply any available coupons or use your account balance.
- Order Summary: View a summary of your order, including the total price and payment methods.
If everything is correct, click the CONFIRM button to complete your payment. If you need to make changes to your materials or add post-processing options, click Back to Configuration to modify your order.
Awaiting Package Arrival
Rest assured, we've got everything covered! All you need to do now is wait for your package to arrive at your doorstep.
You can track your order by clicking the Actions icon in the User Center under the Order & Message section.
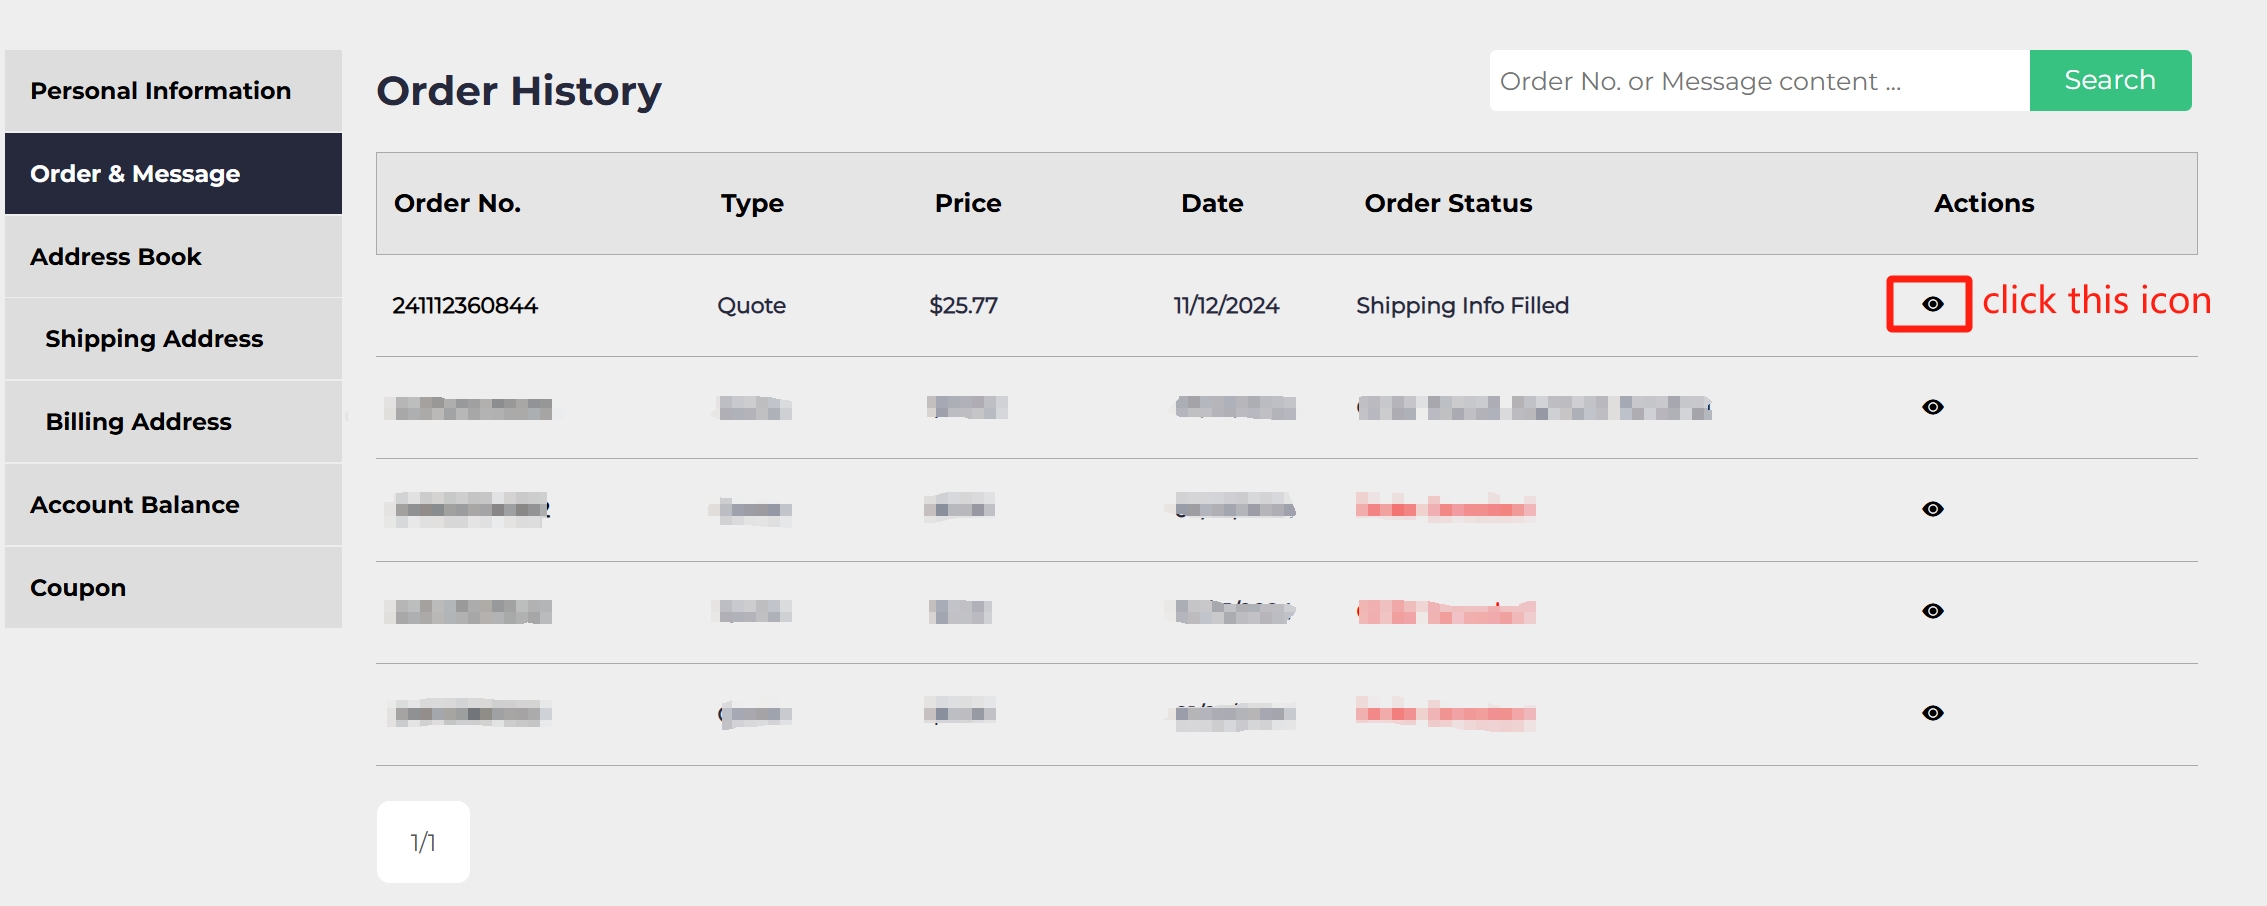
Here, you can view full order details on one page.
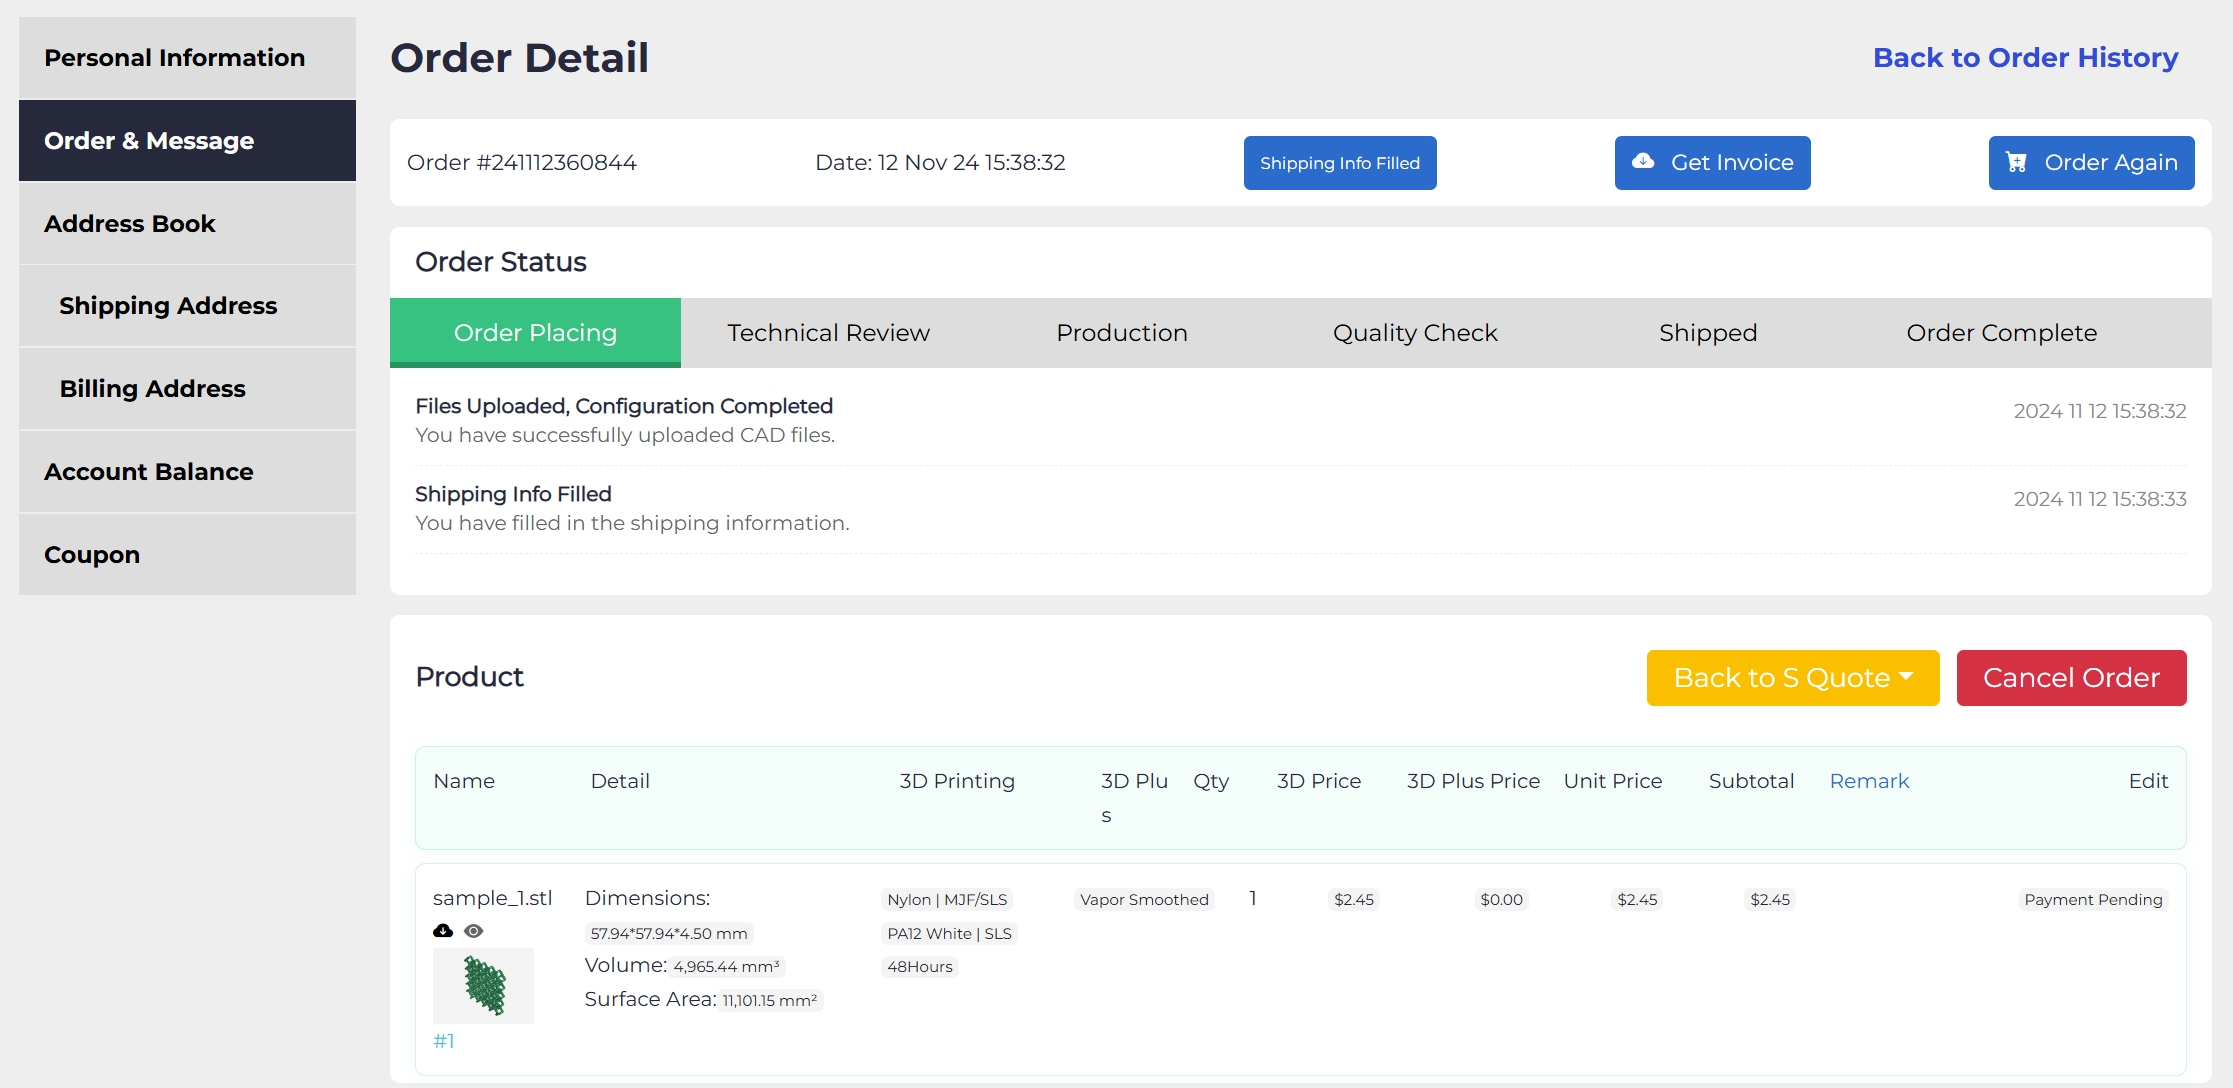
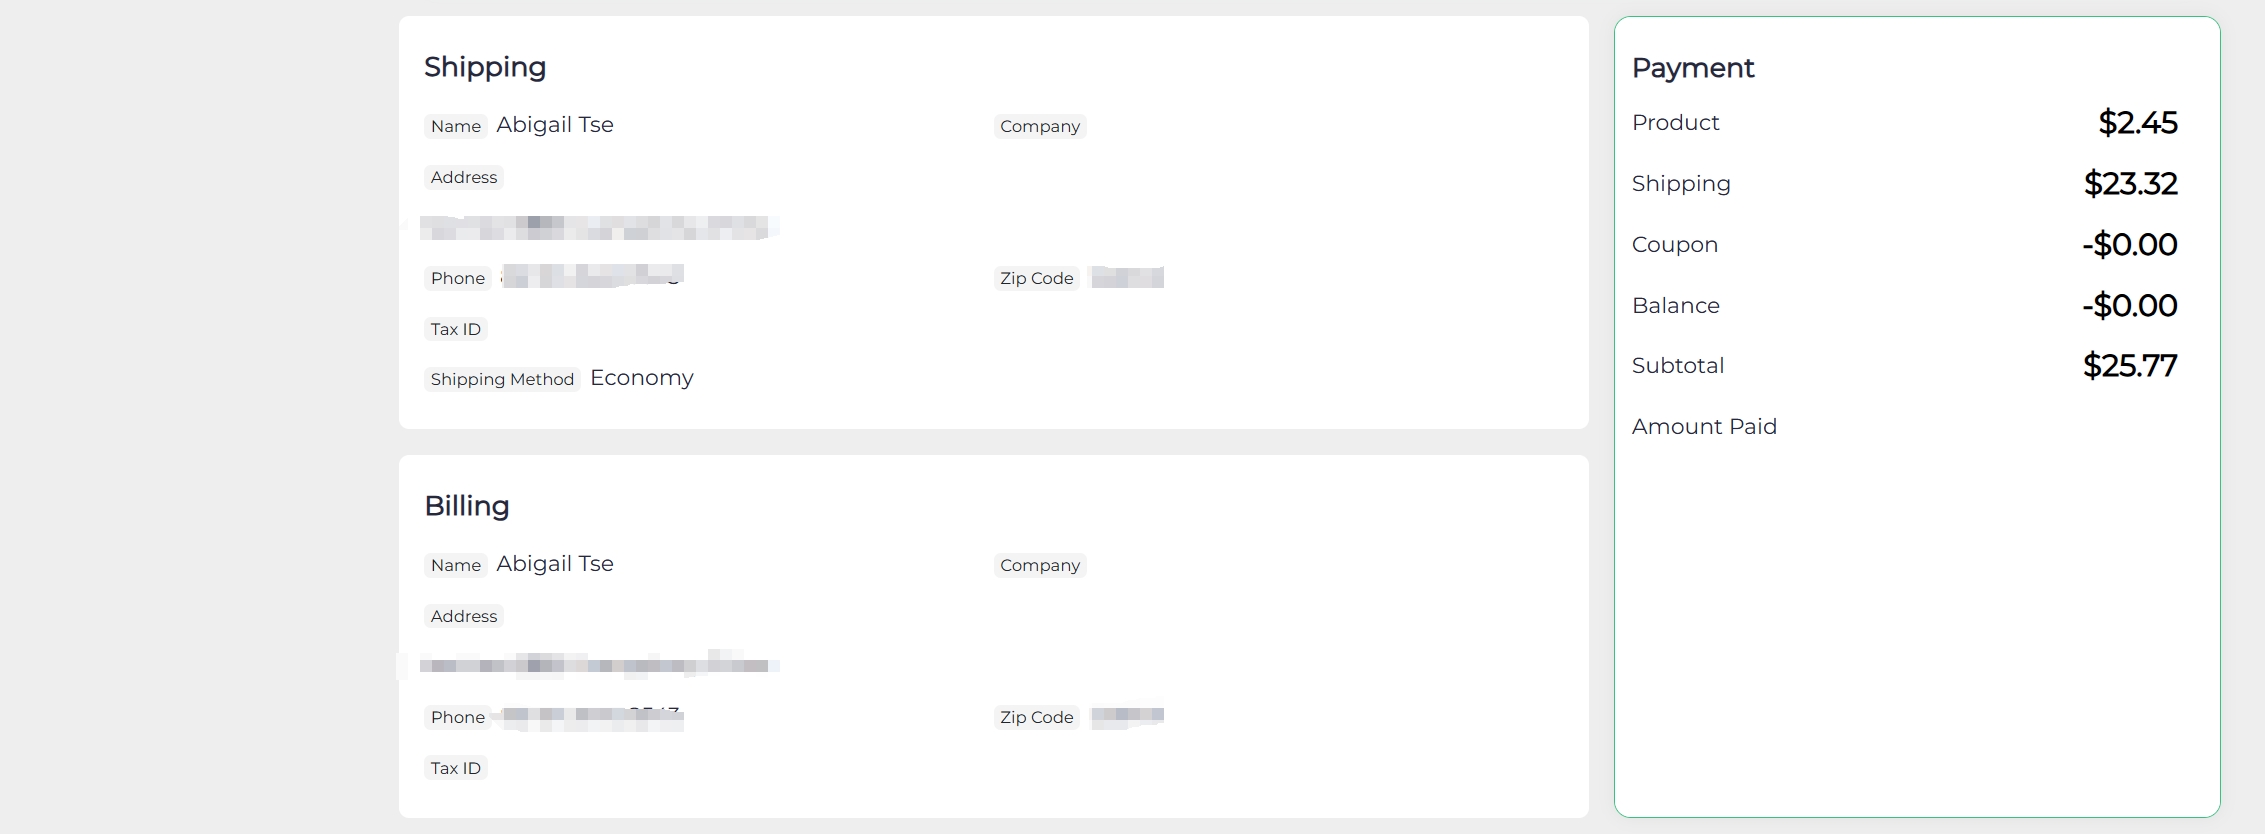
We'll keep you updated with any changes or upgrades to your order through our Squote.
For more information, please feel free to Contact Us.
We are here to help everyone become a PRO in 3D printing. Thank you for choosing 3DSPRO!
COMMENTS
- Be the first to share your thoughts!



![3DSPRO Squote User Manual [Updating]](/Uploads/202412/67639521a83b5.png)
![3DSPRO Lead Time: How fast is our shipping partner? [Updated September 2024]](/Uploads/202409/66d58cef407b1.png)


