STAY INSPIRED

Sign up for 3DSPRO Newsletter and get InSpiration with our content, news and exclusive offers.

3D Plus™ Smooth Sanding

3d plus hardware solution_banner

Smooth Sanding SLA 3D Printed Parts

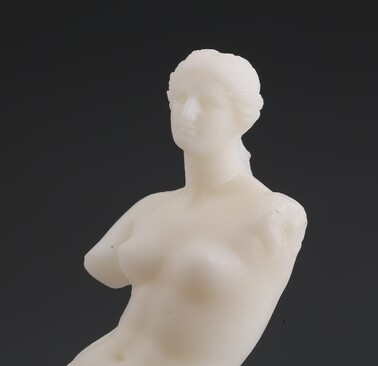
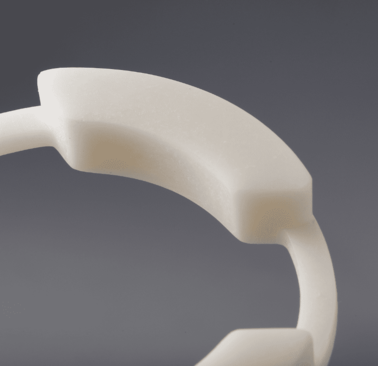
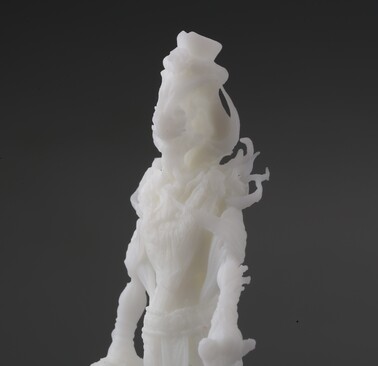
Smooth sanding SLA 3D printed parts is a crucial post-processing step to achieve a refined and polished surface finish. By starting with coarser sandpaper and gradually moving to finer grits, the surface of the parts can be significantly enhanced, resulting in a smooth, professional appearance. Smooth sanding not only improves aesthetics but also prepares the part for subsequent processing (such as painting or coating), ensuring a high-quality final product.

What is smooth sanding?

Smooth sanding is a meticulous process of refining and polishing surfaces. It involves using progressively finer grits of sandpaper to remove imperfections, layer lines, and rough textures.

By starting with a coarser grit and gradually moving to finer ones, the surface becomes increasingly smooth and polished.

Smooth sanding enhances the material's aesthetic appeal and prepares it for further finishing steps, such as painting or coating, ensuring a high-quality, professional result.

The Advantages of Smooth Sanding

1. Smooth sanding removes layer lines and imperfections, resulting in a polished, professional-looking surface.

2. Provides a smooth base for additional treatments, ensuring better adhesion and a flawless finish.

3. By eliminating surface defects, smooth sanding reduces the risk of cracks and weaknesses, extending the life of the part.

4. Allows for meticulous attention to detail, ensuring that intricate parts are finished to the highest standards.

Smooth Sanding Process

1. Preparation: Clean the part to remove any dust or debris. Secure the part to prevent movement during sanding.

2. Coarse Sanding: Start with coarse-grit sandpaper (around 80-100 grit) to remove major imperfections and layer lines. Sand evenly across the entire surface.

3. Intermediate Sanding: Move to medium-grit sandpaper (around 200-400 grit) to further refine the surface, removing scratches left by the coarse sanding.

4. Fine Sanding: Use fine-grit sandpaper (600-800 grit) to achieve a smoother finish. Continue to sand evenly and check the surface for smoothness.

5. Ultra-Fine Sanding: For an ultra-smooth finish, use ultra-fine sandpaper (1000-1500 grit). This step ensures a highly polished surface.

6. Cleaning: After sanding, clean the part thoroughly to remove any residual dust. Use a soft cloth or compressed air for best results.

Quality Inspection Process

Check out the quality inspection process of smooth sanded parts at 3DSPRO.

Visual Inspection
Examine the sanded parts for any remaining imperfections, scratches, or uneven areas. Ensure the surface is uniformly smooth and matches the desired finish.

Surface Roughness Measurement
Use a surface profilometer to measure the roughness of the sanded parts. Confirm that the roughness values meet the specified standards for a smooth finish.

Dimensional Accuracy
Verify the dimensions of the sanded parts using precise measuring tools like calipers. Ensure that the sanding process has not altered the critical dimensions beyond acceptable tolerances.

Consistency Check
Inspect multiple parts from the same batch to ensure consistency in the sanding process. All parts should exhibit the same level of smoothness and finish.

Adhesion Test
If the sanded parts are to be painted or coated, perform an adhesion test. Apply a piece of tape to the sanded surface and remove it to check if any material comes off, ensuring proper adhesion.

Final Inspection
Conduct a thorough final inspection under various lighting conditions to ensure the overall quality and appearance of the sanded parts. Verify that all specifications and standards have been met.

FAQs

Check out the frequently asked questions of smooth sanding.

  • Why is smooth sanding necessary for 3D prints?-
    Smooth sanding is necessary to remove layer lines and surface imperfections that occur during the 3D printing process. This step improves the overall aesthetic and prepares the surface for further treatments like painting or coating, ensuring a professional and polished final product.
  • What type of sandpaper should be used for smooth sanding 3D prints?+
  • Can all 3D printed materials be sanded?+
  • How do you handle delicate or intricate 3D prints during sanding?+
  • What safety precautions should be taken during the sanding process?+

to get the paint Color Chart.

Cookie Policy

3DSPRO collect cookies on your computer to provide more personalized services to you. By using this website, you consent to the cookies we use and our Privacy Policy

Accept