STAY INSPIRED

Sign up for 3DSPRO Newsletter and get InSpiration with our content, news and exclusive offers.

3D Plus™ Tapping

3d plus hardware solution_banner

Tapping 3D Printed Parts

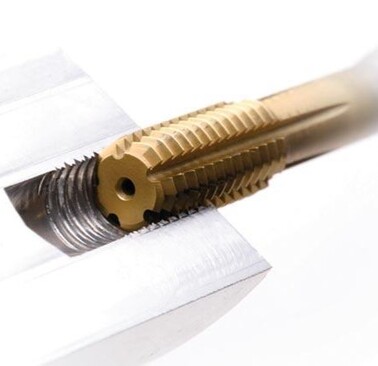
Tapping involves creating threads in pre-designed holes to accommodate screws and bolts. This post-processing technique adds functionality to 3D prints, enabling them to be assembled with other parts using standard hardware. Tapping ensures a secure fit and enhances the structural integrity of the assembly. Whether it’s a prototype or a final product, tapping will transform your 3D print into a fully functional component ready for integration.

What is tapping?

In 3D printing post-processing, tapping refers to the process of creating internal threads in pre-existing holes within a 3D printed part.

Tapping allows the part to securely hold screws, bolts, or other threaded fasteners. By using a specialized tap tool, the material is precisely cut to form these threads, enhancing the part's ability to be assembled with other components.

Tapping is essential for transforming 3D printed objects into functional and mechanically robust parts, suitable for a wide range of practical applications.

The Advantages of Tapping

1. Tapping allows 3D printed parts to be assembled with other components using standard screws and bolts, adding practical utility.

2. Tapping creates precise and consistent threads, ensuring a reliable fit and reducing the risk of loosening over time.

3. Tapping can be applied to a variety of materials and part designs.

4. Tapping is a cost-effective way to add complex functionality to 3D printed parts without requiring additional hardware or complex assembly processes.

Tapping Process

1. Preparation: Begin by ensuring the 3D printed part is clean and free of debris. Select the appropriate tap size that matches the hole and the screw or bolt you plan to use.

2. Drilling: If the hole in the 3D printed part is not already the correct size for tapping, drill it to the recommended diameter for the specific tap size.

3. Tapping: Secure the 3D printed part in a stable position. Insert the tap into the hole and apply gentle, steady pressure. Rotate the tap clockwise, cutting threads into the material. Be sure to turn the tap a full turn forward, then back off slightly to clear the cuttings and reduce stress on the tap.

4. Lubrication: Use a suitable lubricant to ease the tapping process and extend the life of the tap. This is especially important for tougher materials or deeper threads.

5. Completion: Continue tapping until the desired thread depth is reached. Remove the tap and clean the newly threaded hole to remove any remaining debris.

6. Inspection: Check the threads for consistency and accuracy. Test with the corresponding screw or bolt to ensure a proper fit.

Quality Inspection Process

Check out the quality inspection process of tapped parts at 3DSPRO.

Visual Inspection
Examine the tapped holes for any visible defects, such as burrs or irregularities. Ensure that the threads are clean and well-defined.

Dimensional Accuracy
Measure the diameter and depth of the tapped holes using precise tools like calipers or a thread gauge. Confirm that the dimensions match the required specifications and tolerances.

Thread Consistency
Check the consistency of the threads throughout the hole. Use a thread gauge to ensure that the threads are evenly spaced and properly formed.

Functional Testing
Insert the corresponding screw or bolt into the tapped hole to test the fit. Ensure that the fastener threads in smoothly and securely without cross-threading or excessive resistance.

Load Testing
If applicable, perform load testing to verify the strength and durability of the tapped threads. Apply a controlled amount of force to ensure that the threads can withstand the required load without stripping or failing.

Cleanliness Check
Ensure that the tapped holes are free from any debris or residues left from the tapping process. Use compressed air or a cleaning solution to remove any particles that might affect the fit or function of the threads.

Final Inspection
Conduct a comprehensive final inspection under various lighting conditions to ensure that all quality standards and specifications have been met. Verify that the tapped 3D prints are ready for assembly and use.

FAQs

Check out the frequently asked questions of tapping.

  • What is tapping in 3D printing post-processing?-
    Tapping is the process of creating internal threads in pre-designed holes of a 3D printed part to accommodate screws, bolts, or other threaded fasteners.
  • What materials can be tapped in 3D printing?+
  • How do you choose the right tap size for 3D-printed parts?+
  • What are the common challenges in tapping 3D printed parts?+
  • How can you ensure a successful tap in 3D printed parts?+

to get the paint Color Chart.

Cookie Policy

3DSPRO collect cookies on your computer to provide more personalized services to you. By using this website, you consent to the cookies we use and our Privacy Policy

Accept