Types of 3D Printing File Formats
3D Model Files
1. STL
STL, which stands for stereolithography, is a file format native to the stereolithography CAD software created by 3D Systems. Many other software packages support this file format and are widely used for rapid prototyping and computer-aided manufacturing.
STL files describe only the surface geometry of a three-dimensional object without any representation of color, texture, or other common CAD model attributes. The file format uses a series of linked triangles to recreate the surface geometry of the modeled object.
Why STL file format is Popular in 3D Printing
● Simplicity: The STL format is straightforward, making it easy for various software to process.
● Compatibility: Most 3D printing systems accept STL files, ensuring wide usability.
● Efficiency: The format is efficient for slicing software to convert into G-code.
Most 3D modeling software can export models into the STL format. When exporting, it’s crucial to ensure the model is watertight and has no errors such as holes or inverted normals. Tools like Meshmixer or Netfabb can fix common issues in STL files.
2. OBJ
OBJ, or Wavefront Object, is a file format that Wavefront Technologies developed for its Advanced Visualizer animation package. It’s widely adopted for 3D graphics and 3D printing due to its ability to carry detailed information about 3D models.
Features of OBJ Files
● Texture Mapping: It includes details of the texture coordinates.
● Color: It can store information about the color of vertices.
● Material: Through a companion .mtl file, it can specify material properties like shininess, illumination, and more.
Most advanced 3D modeling software can export to .obj format. When doing so, ensure that the model is properly textured and that all associated files (like .mtl) are included. While .obj files are rich in detail, they can be large and complex. Check that your printer’s slicing software can handle .obj files effectively.
The .obj file format is ideal for projects that demand high fidelity and intricate detail. It bridges the gap between simple shapes and complex, textured models, allowing for a richer representation of your creative vision in the 3D printed form.
3. 3MF
3MF, which stands for 3D Manufacturing Format, is a relatively new file format developed by the 3MF Consortium. It aims to resolve the limitations of older file formats and to establish a standard that caters to the complexity of modern 3D printing.
Advantages of 3MF File Format
● Rich Information: Unlike .stl, .3mf can store information about materials, colors, and textures.
● Precision: It allows for more precise definitions of objects, leading to higher-quality prints.
● Interoperability: Designed to eliminate the problems of other formats, ensuring seamless transitions between different software and printers.
3MF files are structured in a way that they can describe a model completely and unambiguously. It can define and describe multiple objects within a single file and contain thumbnail images for visual reference.
When exporting to .3mf, it's crucial to ensure all necessary information is included and correctly referenced. While .3mf files are comprehensive, it's advisable to use built-in tools or third-party validators to check for errors. Also, keep an eye on the file size, especially when dealing with complex models, to ensure smooth operations.
The .3mf file format is poised to become the new standard in 3D printing thanks to its ability to carry detailed information and support advanced printing features. This means you can expect more precise prints, richer visual representations, and seamless transitions between different software and printers.
4. STEP
STEP files are more than just a means to represent 3D objects; they encapsulate a wide range of product data, including geometry, topology, and even material properties, which makes STEP files incredibly versatile for various industries, including manufacturing and engineering.
Creating .STEP files typically involve using professional CAD software. When exporting your design as a STEP file, ensure that all relevant data is included and accurately represented. While .STEP files are detailed; they can be complex and large in size. It is better to reduce complexity where high precision is not required.
STEP files are a powerful tool in the 3D printing process, especially for industrial applications where precision and a high level of detail are paramount. By leveraging the capabilities of STEP files, designers and engineers can ensure that their creations are not only accurately represented but also ready for the exacting demands of modern 3D printing technologies.
5. IGES
IGES is a file format that was first published in the early 1980s by the United States National Bureau of Standards as a neutral format for the digital exchange of information among computer-aided design (CAD) systems.
While less common in the consumer 3D printing market, IGES files are still used in professional settings where legacy systems are in place or where interoperability between different CAD systems is required.
In some cases, converting IGES files to more contemporary formats like STL or 3MF may be beneficial for better integration with modern 3D printers.
6. GLTF
GLTF is known as the “JPEG of 3D” for its ability to efficiently deliver 3D models with rich detail and small file sizes. It is an open standard developed by the Khronos Group, a consortium focused on the creation of open standard, royalty-free APIs to enable the authoring and acceleration of digital media.
Many 3D modeling tools offer the option to export models directly to .gltf format. When exporting, ensure that all relevant data is included and properly configured for the best results. Make sure the slicing software and 3D printer can handle .gltf files or convert them to a compatible format if needed.
7. FBX
FBX is a proprietary file format owned by Autodesk. It is widely used to exchange and store complex 3D models, animations, and scenes across different platforms and software. Originally designed for film and television, it has found a significant place in 3D printing as well.
FBX files are typically created in 3D modeling software like Autodesk Maya or 3ds Max. When exporting to .fbx, it’s important to ensure that all necessary data is included and properly linked.
FBX files offer a robust solution for storing and transferring complex 3D models, making them a valuable asset in the 3D printing industry. Their ability to maintain high levels of detail and support for animations makes them particularly useful for advanced 3D printing projects that push the boundaries of creativity and technical capability.
8. BREP
BREP, or Boundary Representation, is a method for describing the geometry of a 3D object. Unlike other file formats that focus on the surface or mesh, BREP provides a more comprehensive description.
BREP is a way to represent shapes using the limits of the volume—the boundaries. It defines a 3D object by its topological and geometric information, including faces, edges, and vertices, as well as the relationships between them.
While BREP is not a file format in itself, many 3D printing file formats use BREP principles to describe objects. Formats like STEP and IGES are based on BREP, making them suitable for applications that require precise geometric definitions.
BREP models are typically created in CAD software that supports precise engineering and architectural work. When working with BREP, it’s important to ensure that all geometric and topological relationships are correctly defined. BREP is a foundational concept in 3D modeling that underpins many of the more complex file formats used in professional 3D printing.
9. CTM
The .ctm file format, standing for Compressed Triangle Mesh, is a 3D file format that offers a compact representation of mesh models. CTM is designed to store geometric mesh data in a highly efficient, compressed form. It’s particularly useful for applications where file size is a concern without significantly compromising the detail and quality of the model.
CTM files are typically generated from existing 3D models using software that supports the format. When creating a .ctm file, it’s important to balance the level of compression with the desired quality of the print. CTM files offer a practical solution for managing 3D model data efficiently, especially in situations where bandwidth or storage is limited.
10. PLY
The .ply file format, also known as the Polygon File Format or Stanford Triangle Format, is versatile and widely used in 3D printing and scanning.
PLY is a computer file format that is used to store three-dimensional data. It was principally designed to store geometric data from 3D scanners. The format is flexible and can store data such as vertices, faces, and colors.
PLY files offer a robust solution for storing and transferring detailed 3D data. Their ability to hold rich information makes them particularly useful for applications that require high-fidelity representations of complex objects, such as those produced by 3D scanners.

Toolpath Files
1. G-code
G-code is a language that directs the 3D printer on how to construct the object layer by layer. It controls aspects such as movement, speed, flow rate, and temperature, ensuring the printer executes the design as intended.
Structure of G-code Files
● Layer Instructions: G-code files contain a series of commands that guide the printer on how to build each layer.
● Path Optimization: The commands are optimized to ensure the print head takes the most efficient path.
● Parameter Settings: They include settings for temperature, print speed, and material flow rates.
Why G-code is Essential for 3D Printing
● Precision: G-code provides the printer with precise movements, ensuring the final print matches the original design.
● Control: It gives users the ability to fine-tune print settings for different materials and resolutions.
● Universality: Most 3D printers use G-code, making it a universal toolpath file format in the industry.
G-code files are generated by slicing software, which converts 3D models into a series of layers and calculates the best path for the print head to follow. Users can often customize the G-code to adjust for specific printer characteristics or material properties.
G-code is the final, critical step in the 3D printing process, serving as the blueprint that brings models to life. Its role in translating digital designs into physical objects is unparalleled, making it the cornerstone of the 3D printing workflow. Understanding and mastering G-code can lead to improved print quality and a more efficient printing process, allowing for the creation of intricate and reliable 3D objects.
2. X3G
X3G files are a binary format that contains instructions for 3D printers, similar to G-code. However, X3G is specifically designed for printers that use MakerBot-derived firmware, such as those from the Replicator series.
X3G files play a key role in the 3D printing ecosystem for a specific subset of printers. They provide an efficient and tailored approach to delivering print instructions, ensuring that users with compatible printers can achieve high-quality prints with minimal fuss.
3. 3W
3W files are specific to XYZprinting’s ecosystem and designed to work seamlessly with their suite of 3D printers. These files contain encoded instructions that guide the printer in creating the 3D model. Users typically do not need to interact with the file directly, as the software handles the conversion and preparation for printing.
3W files represent a specialized approach to 3D printing, offering a secure and optimized toolpath file format for users of XYZprinting’s 3D printers.
4. G3DREM
G3DREM, which stands for Geeetech 3D printer Raster Model, is a file format used by Geeetech 3D printers. It contains rasterized layer data that instructs the printer on how to create each layer of the object.
Unlike vector-based formats like G-code, G3DREM files store information as a series of raster images representing each layer. G3DREM files include detailed instructions for each layer, ensuring precise control over the printing process.
5. BFB
BFB files are specific to 3D printers that were originally developed by the company Bit From Bytes. Similar to G-code, BFB files provide detailed instructions for each layer of the print but in a format proprietary to Bit From Bytes.
BFB files play a niche role in the 3D printing file format landscape, catering specifically to users of Bit From Bytes printers. They exemplify the diversity of toolpath files in the industry, each tailored to meet the needs of different printing technologies and user requirements.
Preparation Before 3D Printing
3D Modeling
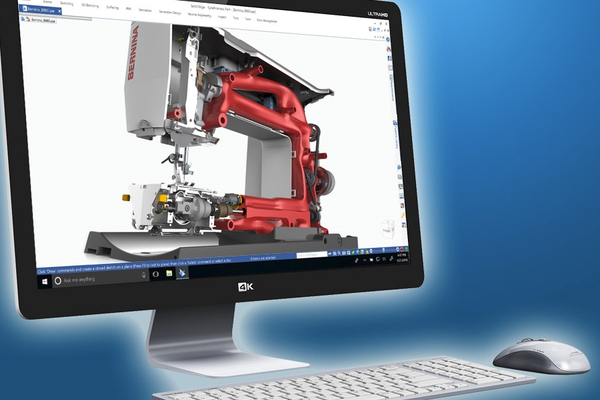
Before the exciting process of 3D printing begins, one must undertake the crucial step of 3D modeling. This preparatory phase is where ideas and concepts take a digital form.
3D modeling is the process of using software to create a mathematical representation of a three-dimensional object. By manipulating vertices in virtual space, designers can form complex shapes and designs that can be translated into physical objects through 3D printing.
The choice of 3D modeling software is pivotal. For beginners, software like TinkerCAD or SketchUp is user-friendly and provides a gentle introduction to the world of 3D design. Professionals might opt for more advanced solutions like Autodesk Fusion 360 or SolidWorks, which offer a robust set of tools for precision modeling.
When designing for 3D printing, it's essential to consider the limitations and capabilities of the printer. Factors such as the resolution, the print bed size, and the type of 3D printing technology (FDM, SLA, SLS, etc.) will influence the design parameters.
To ensure a successful print, models must be optimized, including checking for non-manifold edges, ensuring sufficient wall thickness, and adding supports where necessary. Tools within the modeling software can help identify and fix potential issues before printing. Once the model is complete, it must be exported in a file format compatible with 3D printers. This process involves converting the model's geometry and other relevant data into a format that the printer can understand and interpret. The most common file formats for 3D printing are STL and OBJ, which we will discuss in the following paragraph. These files contain the geometric data needed to instruct the printer on how to create the object layer by layer.
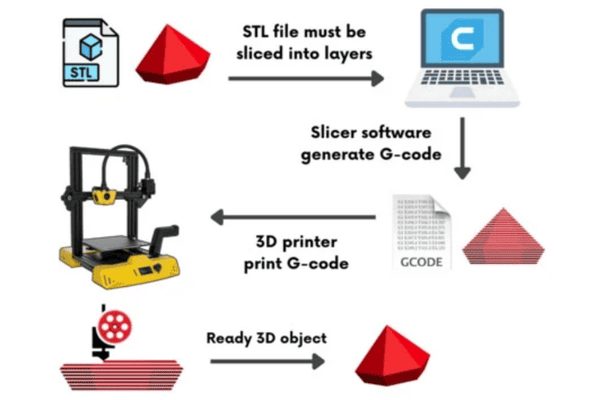
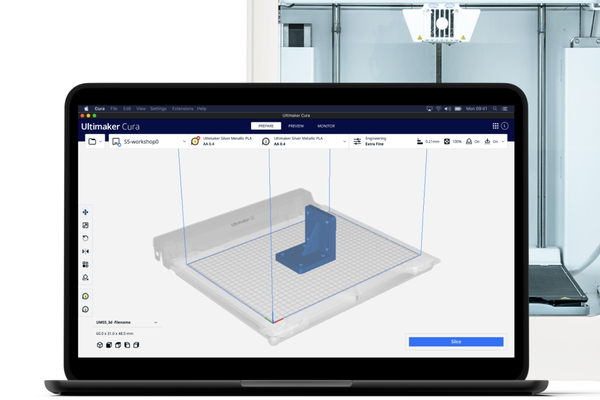
Slicing
Slicing is the process of converting a 3D model into a series of horizontal layers and generating the necessary instructions for a 3D printer. The slicing process translates the model into a language that the printer can understand—typically G-code.
Choosing Slicing Software ranges from manufacturer-specific software like Ultimaker’s Cura to universal slicers like PrusaSlicer or Simplify3D. Each offers different features and levels of control over the printing process.
Within the slicer, you’ll set parameters that affect print quality and strength. These include layer height, infill density, print speed, and temperature settings. It’s a balancing act between print speed, detail, and structural integrity.
Layer height determines the resolution of the print—the smaller the height, the finer the detail. Infill density impacts the object’s strength and weight. A higher infill means a stronger but slower and more material-intensive print. For models with overhangs or complex geometries, support structures are generated by the slicer. These are essential for maintaining the shape during printing but must be removed post-printing.
Most slicers provide a preview of the toolpaths and the finished print. Use this feature to spot potential issues and adjust settings accordingly. Iteration is key to achieving the best results.
Once satisfied with the setup, the slicer will export the G-code file. This file contains all the instructions for the printer, including movement, speed, temperature, and cooling.
G-code
G-code, short for “geometric code,” is a programming language used in computer-aided manufacturing to control automated machine tools. In 3D printing, it serves as the final output of the slicing process.
After a 3D model is sliced, the slicer software translates the model into G-code, which provides a set of precise instructions for the 3D printer. These instructions include where to move, how fast to move, and what path to follow. G-code commands are a series of letters and numbers that represent different actions.
Advanced users can modify G-code to fine-tune their prints, such as changing speeds for different sections of the print or altering temperatures for different materials. Always review and understand the G-code before printing, especially if it’s been manually edited.
G-code is the final step in the journey from concept to creation in 3D printing. By mastering the basics of G-code, you can unlock the full potential of your 3D printer and bring your most intricate designs to life with precision and confidence.

A Plane STL File Preview in Magics
Upload Your 3D Models and Let Us Handle the Rest
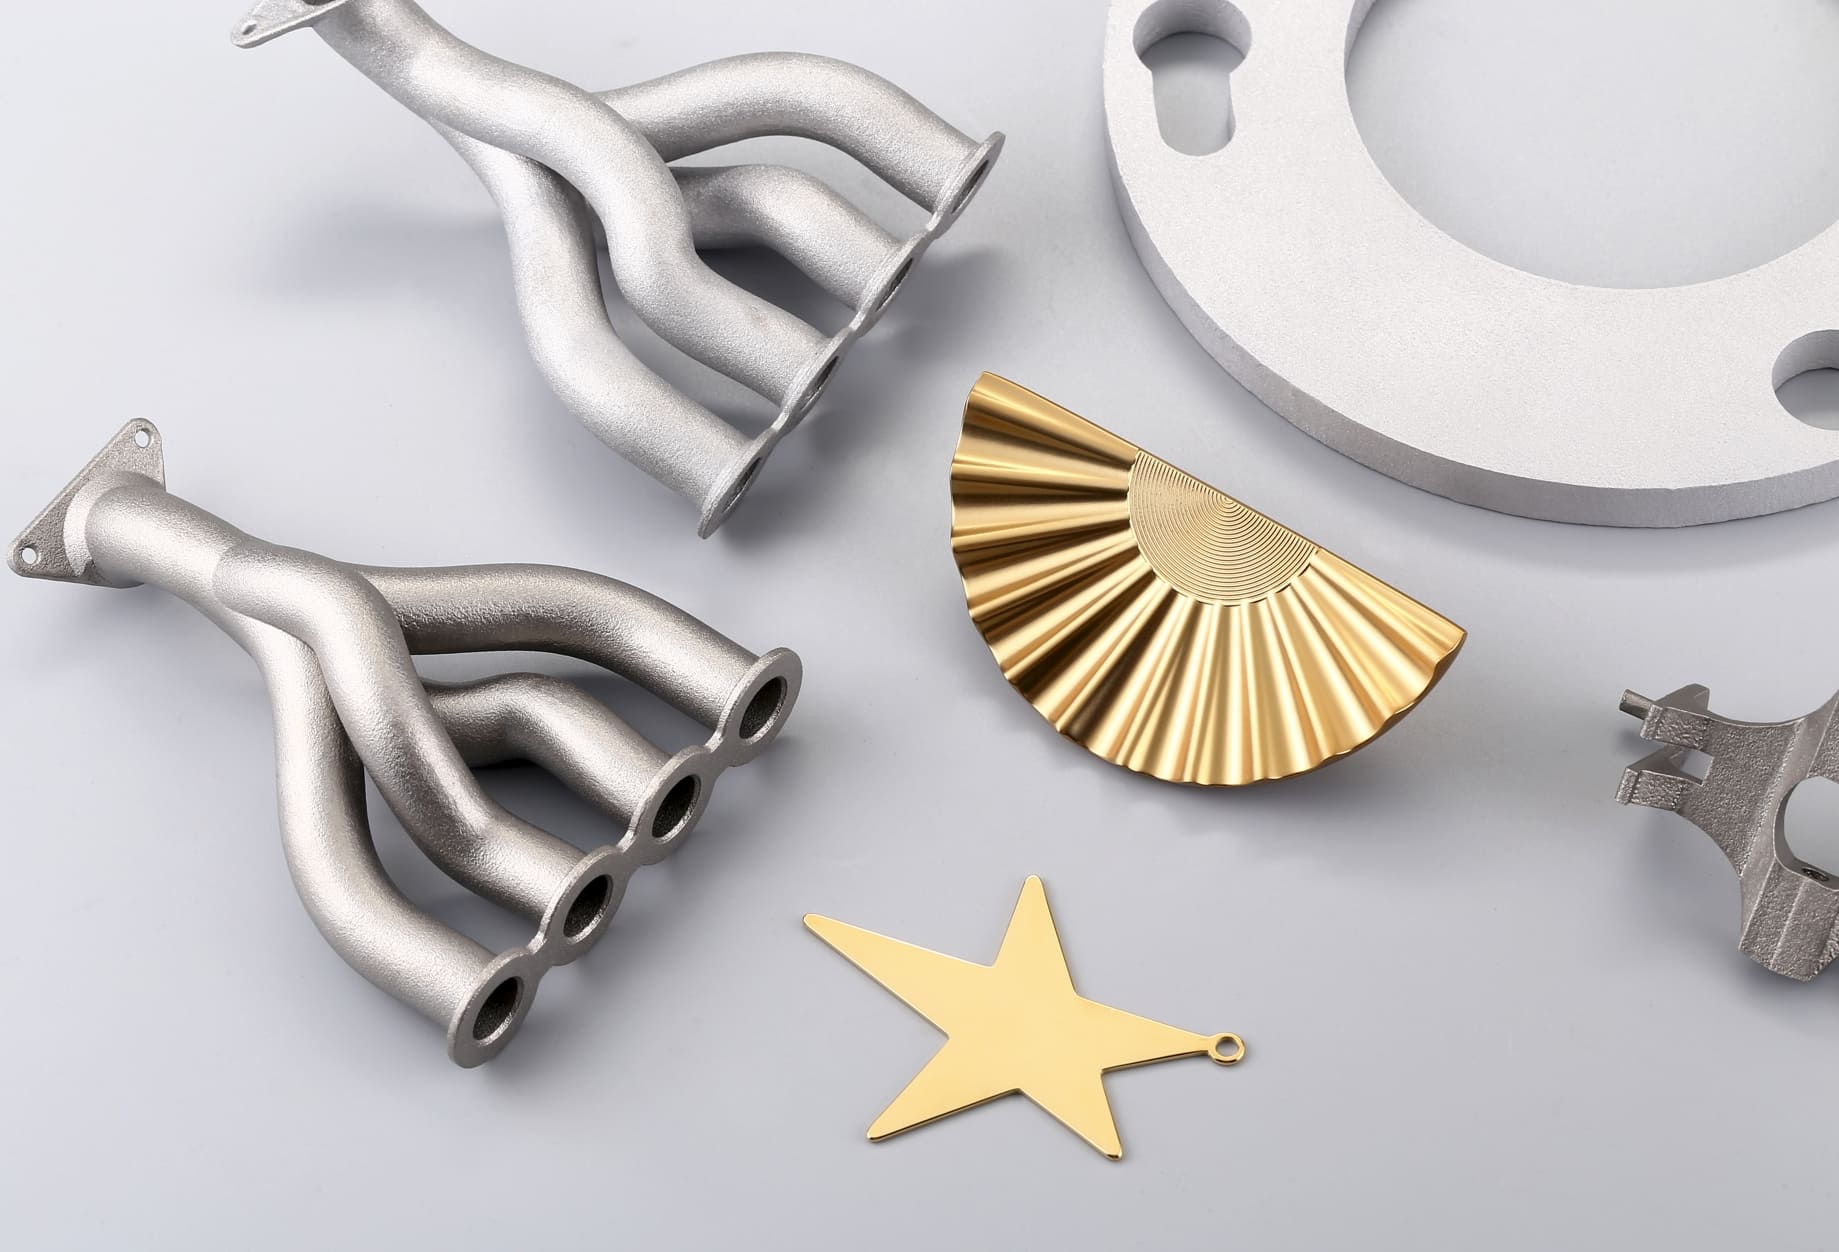
Embarking on a 3D printing project can be a journey filled with intricate details and technical nuances. But what if you could skip the complexity and dive straight into bringing your ideas to life? With 3DSPRO’s 3D printing solutions, that’s exactly what you can do.
Uploading your 3D models to our platform is a breeze. Our user-friendly interface allows you to drag and drop your files and receive an instant quote. No more guesswork or waiting—just immediate, transparent pricing.
Once you upload your model, our team of experts takes over. We meticulously review every detail of your design to ensure it is optimized for printing. Our goal is to deliver prints that meet your expectations and our high standards. Whether your project calls for SLM metal 3D printing, SLA, SLS, or MJF, we have the tools and expertise to produce high-quality prints with precision and speed.
From high-performance metals to flexible plastics, from translucent resins to durable nylons, you can choose from a wide range of materials to suit your project’s needs.
Each print undergoes a rigorous quality check to ensure that it matches the provided specifications. After printing and quality checks, we carefully package and ship your 3D prints directly to you. No matter where you are, you can count on 3DSPRO to deliver excellence to your doorstep.
Upload your models, choose your materials, and let us handle the rest. We’re here to make 3D printing accessible, hassle-free, and enjoyable for everyone.

 0
0


COMMENTS
- Be the first to share your thoughts!