Clear SLA prints are incredibly useful for prototypes, light pipes, lenses, and display covers, but getting truly transparent parts requires more than just a successful print. Surface roughness, trapped bubbles, incomplete cure, and internal stress all scatter light and turn a promising translucent print into a cloudy one.
We have Transparency surface finishing service for SLA clear resin >>
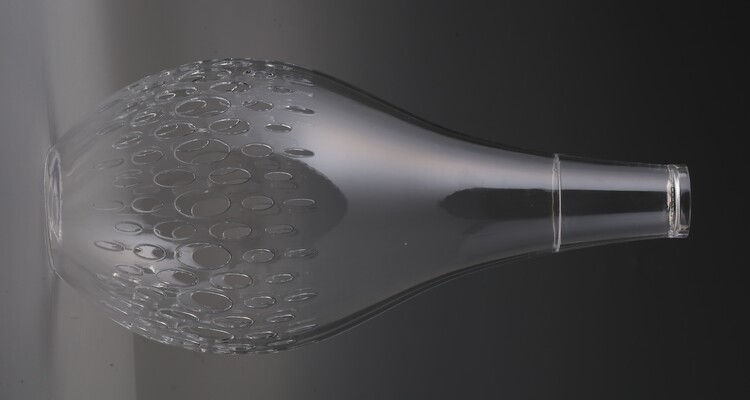
Image Copyright © 3DSPRO Limited. All rights reserved.
Why Clear SLA Parts Lose Transparency
1. Surface Roughness and Layer Lines
SLA prints build up extremely fine layers, but even micrometer-scale ridges scatter light. Surface scattering is the single biggest culprit for loss of optical clarity. Any machining marks, support scars, or sanding scratches make light deviate and reduce transmission.
2. Internal Defects: Bubbles, Voids, and Uncured Regions
Trapped air bubbles, uncured pockets of resin, or regions with different cure density create refractive index mismatches inside the part. Light hitting these internal discontinuities scatters, producing haze.
3. Material Chemistry and Additives
Not all “clear” resins have the same base chemistry. Photoinitiators, pigments, or impurities can absorb/reflect certain wavelengths. Some resins yellow sooner than others with UV or heat exposure, reducing long-term clarity.
4. Residual Stress and Crazing
Curing causes polymer chains to crosslink and shrink slightly; uneven cure, thermal gradients, or aggressive mechanical handling can cause microcracks. Those tiny cracks are excellent light scatterers.
5. Incorrect Post-Cure
Under-cure leaves partially polymerized zones that absorb light; over-cure, excessive heat, or aggressive post-cure can create yellowing or embrittlement. Controlled post-cure is therefore critical.
Clear Resin Post-processing Workflow
Step 1: Print Orientation and Minimal Supports
• You get better results faster if you already printed with clarity in mind:
• Orient optical faces away from heavy supports and layer stair-stepping.
• Use the finest practical layer height for your part; thinner layers reduce initial surface roughness.
• Avoid trapping pockets where uncured resin can remain.
Step 2: Washing
• Rinse with fresh IPA (or the resin manufacturer’s recommended solvent). Agitate gently or use an ultrasonic bath for small parts.
• Avoid long soak times that could swell or soften delicate features.
• Remove trapped liquid from cavities by tilting and gently compressing air. Do not use excessive pressure that could drive resin into microcracks.
Step 3: Support Removal and Initial Cleanup
• Remove supports with flush cutters and finish with a scalpel or microfiles. Keep gouges to a minimum; damage here means more sanding later.
• For optical faces, try to design supports off the critical surfaces; remove everything but plan to sand and polish on those faces.
Step 4: Controlled Post-Cure
• Follow the resin supplier’s guidance as a starting point. Use a consistent UV source and avoid high heat.
• A slow, uniform cure minimizes internal stress. If you suspect heat-driven stress, cure at room temperature with lower intensity before finishing with a short, slightly stronger cure.
• If parts are large or thick, rotate them during cure so all surfaces get even exposure.
Step 5: Wet Sanding
• It is where most haze is fixed. Wet sanding reduces surface roughness progressively:
• Start at a relatively coarse grit only to remove noticeable support marks.
• Move through a fine progression: 800 → 1200 → 2000 → 3000+. Keep the surface wet and use a flat sanding block for even pressure.
• For curved parts, use flexible sandpaper and light, even strokes. Re-wet often and remove debris so you don’t create new scratches.
Step 6: Mechanical Polishing
• Use a plastic-safe polishing compound and a soft buffing pad or microfiber wheel.
• Polishing by hand with a soft cloth and a small amount of compound is fine for delicate parts; for larger parts, low-speed rotary buffing will give faster, more uniform results.
• Finish with a fine plastic polish or jeweler’s rouge until optical clarity improves. Wipe with lint-free cloths.
Step 7: Solvent Smoothing or Chemical Polishing
• Some plastics can be chemically smoothed by exposing the surface to a solvent vapor that slightly melts and flows the top layer. Do not assume all clear SLA resins are compatible.
• Solvent smoothing risks swelling, loss of detail, or crazing, and can cause optical distortions if not uniform. Test on a scrap before applying to a part.
• In many cases, mechanical polishing + clear coating is a safer route.
Step 8: Clear Coatings and Protective Finishes
• Applying thin, even clear coats often gives the best final optical finish while adding scratch resistance.
• Sprayed clear acrylics, lacquer, or thin epoxies can level micro-imperfections and increase gloss. Multiple thin coats, sanded lightly between coats, work better than one heavy coat.
• For functional optics, prefer coatings designed for optical applications and mind refractive index mismatch when bonding components.
Step 9: Internal Clarity
• For parts with internal bubbles or porosity, vacuum impregnation with clear resin or potting compounds can fill voids and reduce scattering. It is advanced and typically used on light pipes or small lenses:
• Degas your impregnating resin under vacuum, apply it to the part, then cure carefully.
• Beware of refractive index mismatch—filling material should be optically compatible.
Troubleshooting Common Problems
Problem: Persistent Haze after Polishing
Causes and Fixes:
• Internal bubbles or microvoids. Fix: consider vacuum impregnation or recasting the part.
• Scratches missed in sanding. Fix: go back to a coarser grit in the area and progress upward again.
• Surface contamination. Fix: clean with IPA and re-polish.
Problem: Yellowing over Time
Causes:
• UV exposure, heat, or resin chemistry lacking stabilizers.
Prevention and Fixes:
• Store finished parts away from direct sunlight.
• Use UV-stable clear coats or UV inhibitors as topcoats.
• For severe yellowing, a light sanding and re-coating may restore appearance.
Problem: Crazing or Microcracking after Solvents or Heat
Crazing appears as fine, spiderweb cracks that scatter light.
• Prevention: avoid aggressive solvents, don’t overheat during post-cure, and relieve stress with gentler curing.
• Repair: minor crazing can sometimes be filled with a thin coat of epoxy or refractive-index-matched resin; extensive crazing often means reprinting and changing the cure strategy.
Problem: Wavy Optical Surface after Coating
Causes:
• Too thick a coat, orange-peel effect from spray application, or contamination.
Fix:
• Sand the coating back gently (2000–3000) and reapply multiple thin coats. Use a controlled environment to avoid dust.
 0
0


COMMENTS
- Be the first to share your thoughts!